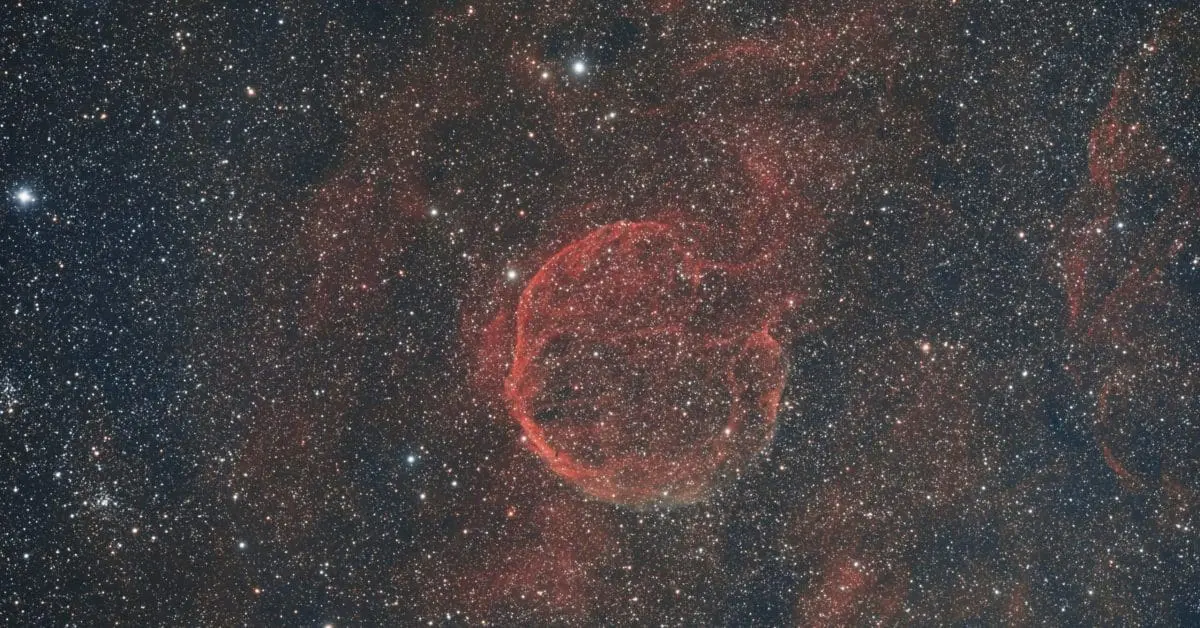
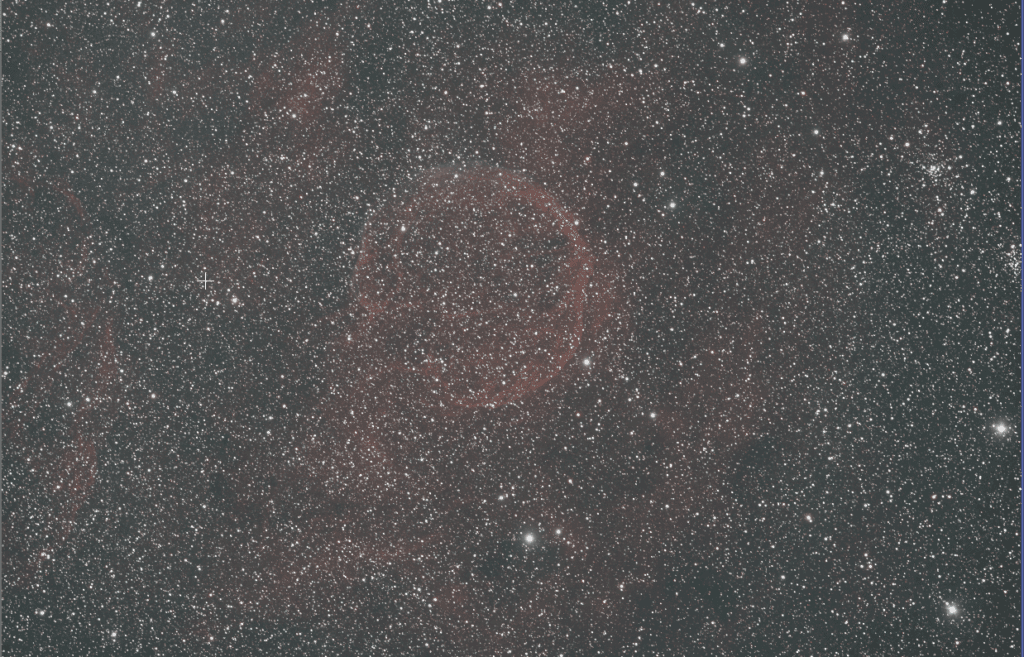
Over the course of four nights, we managed to capture several hundred frames, allowing us to present Abell 85, an extremely faint supernova remnant.
Interestingly, this image was taken from my backyard during the nights leading up to a full moon, showcasing the impressive capabilities of modern equipment and narrowband filters. The OIII region appears slightly affected, visible as a whitish area at the bottom of the supernova remnant. Many might increase the saturation for this effect, but we chose to preserve its natural state.
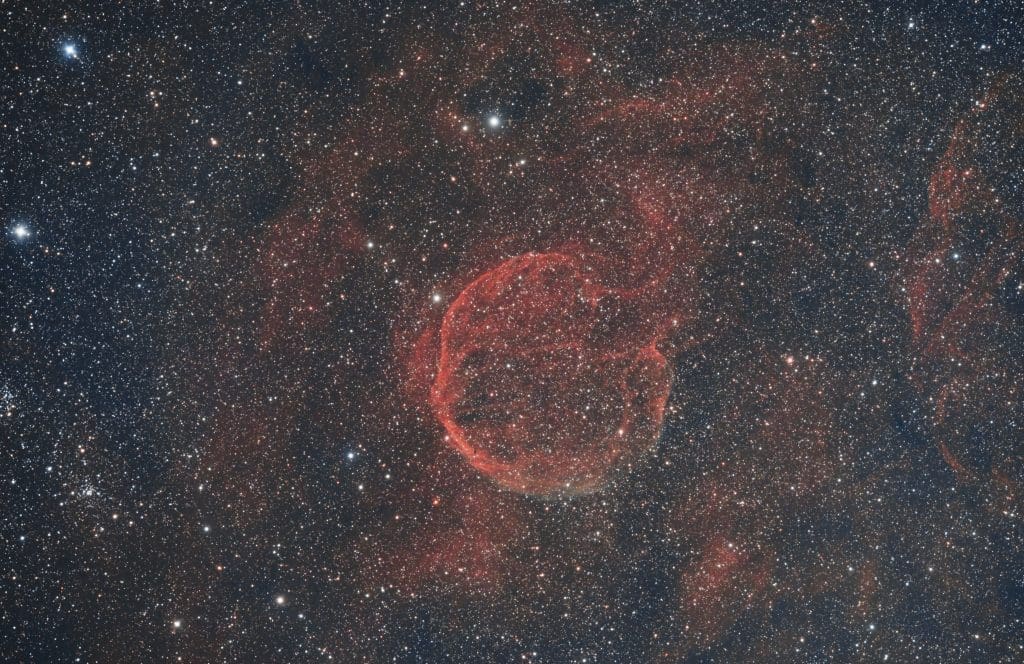
As we continue to refine our guide for our readers, an HOO version will be provided, likely to resemble the enhanced blue OIII region often displayed on other sites.
Abell 85 Acquisition
Captured on the week leading up to a full moon in my Bortle 7-8 skies of North Austin 😉
- Esprit 120 w/.65 reducer at 545mm FL
- ASI 2600mc-pro camera
- Triad Ultra Quad NB filter (Ha,Hb,OIII,SII)
- 359 x 300 second exposures over 4 nights.
Data Download
Download Abell 85 stacks and experiment with our data!
 This work is licensed under a Creative Commons Attribution 4.0 International License.
The XISF and FITS is stacked and calibrated with flats, dark flats and bayer-drizzled in PixInsight for calibration & stacking.
If you wish to experiment with individual calibrated subs, please contact us and we’ll be happy to share them with you!
We have other data to share! Download M31 Andromeda Galaxy or see if you can conquer editing out the infamous Squid or check out the beautiful Heart nebula!
PixInsight Processing Abell 85
These guides are our simple processing guides. Nothing terribly complex – just cleanup, cropping, calibration, noise cleanup, stretching, curves and tweaking. If you’re interested in more comprehensive guides we offer more detailed steps for our Patreons, consider joining today.
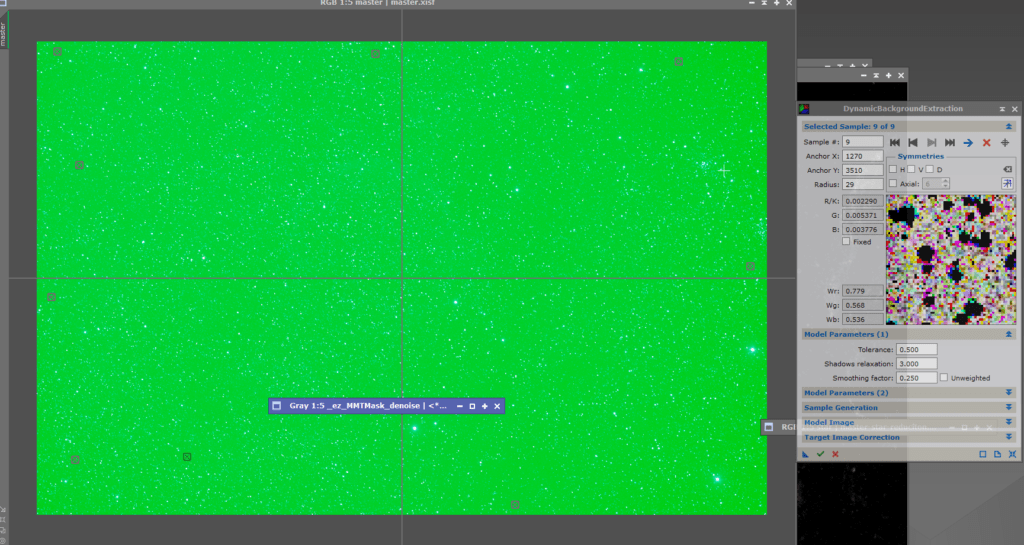
Step One – Dynamic Background Extraction
When you open our dataset you will be welcomed with a green-ish image. We’ll use DBE to remove this gradient so we can start processing. When you place the DBE points on your image, avoid the middle area since that is where our supernovae is.
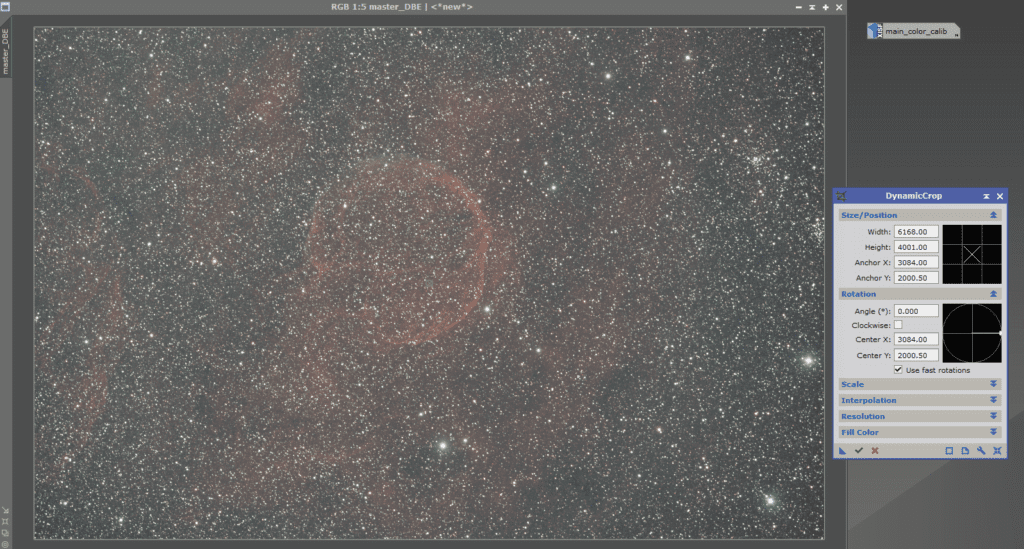
Step Two – Dynamic Crop
With hundreds of dithered frames stacked some of the edges of our image have some artifacts. We’ll crop them out since these artifacts can cause issues in the post processing steps
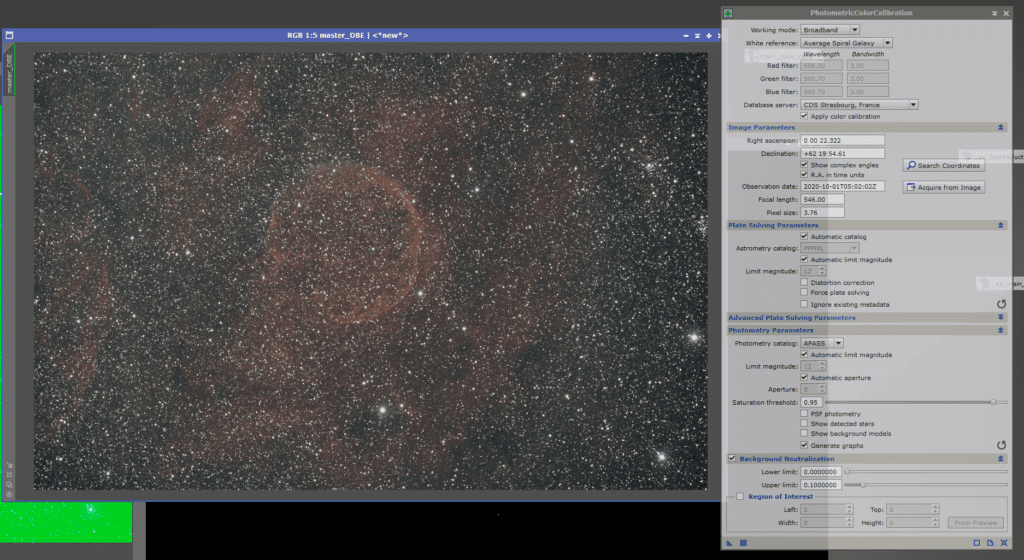
Step Three – Photometric Color Calibration
Photometric Color Calibration will help correct our color and do background neutralization at the same time.
If you want to run PCC – the focal length was 540 and pixel size was 3.76.
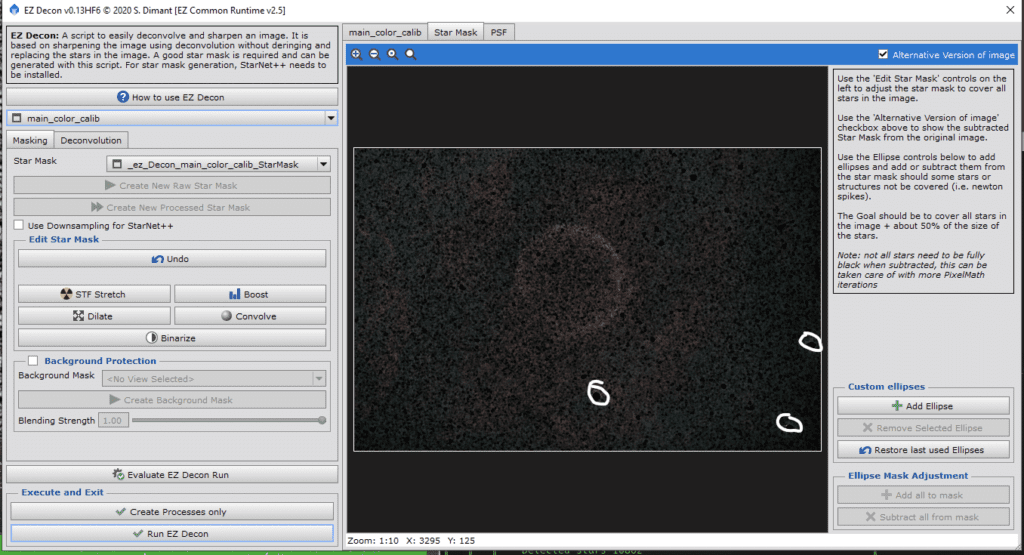
Step Four – EZ Deconvolution
As mentioned before, EZ Deconvolution makes it so easy to do, that I just do it all the time. This image has a HUGE amount of stars so you have to be careful.
Click the “Create new processed Star Mask” and let it generate a mask.
On your mask – you may need to add ellipse – The 3 circled areas In the image below show where i had to use a small ellipse to block out bright stars. If you don’t block out these bright star/regions that may not be masked by the automatic masking then you may see bright red spots pop up on them during deconvolution.
Click on the Deconvolution Tab and then click “Generate PSF”
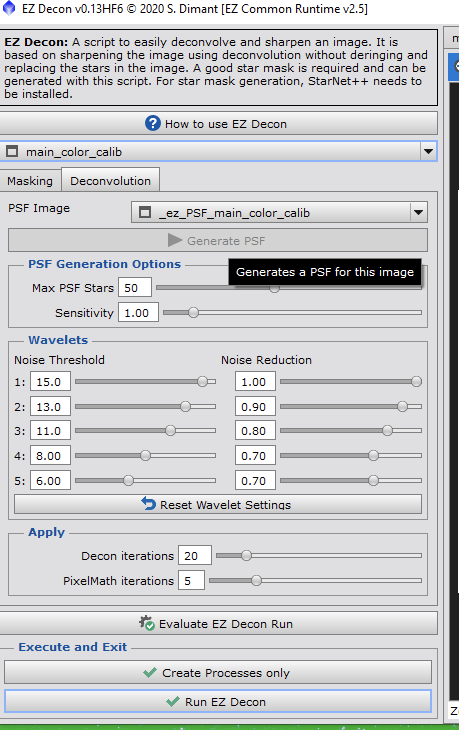
Generating PSF on this image may cause PixInsight to become unresponsive. There are over 10,000 stars in the image, so it seems to get stuck. Be patient and wait it out.
Once it returns, click “Run EZ Decon”
Step Five – EZ Denoise
Time to cleanup some of the noise. I pretty much leave it set at defaults
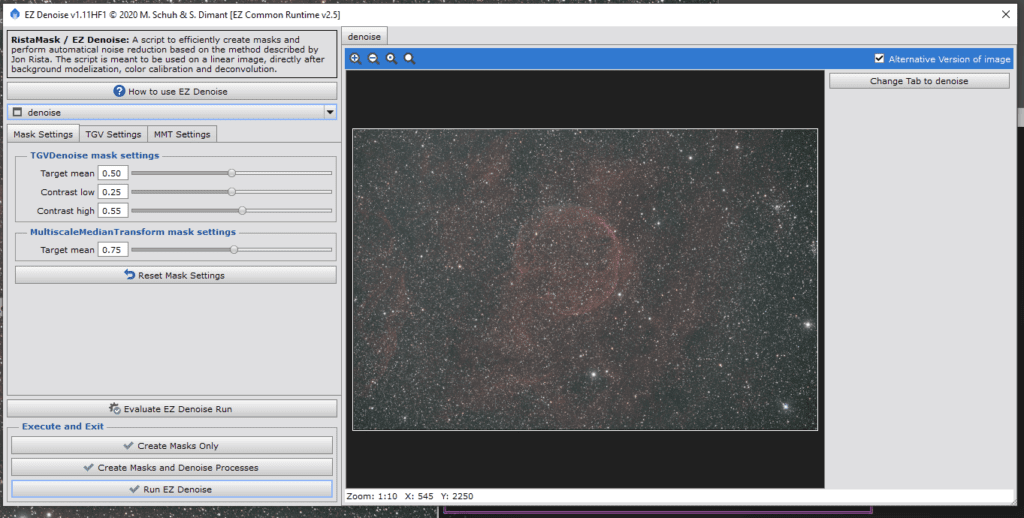
Click run “EZ Denoise” and hurry up and wait
Image is starting to look pretty clean!
Step Six – EZ Soft Stretch
If you haven’t seen yet, I love these EZ steps for explaining the easiest way to make a decent image. EZ Soft Stretch does just that – helps us get a nice basic curve/stretch and gives us a great foundation to build from.
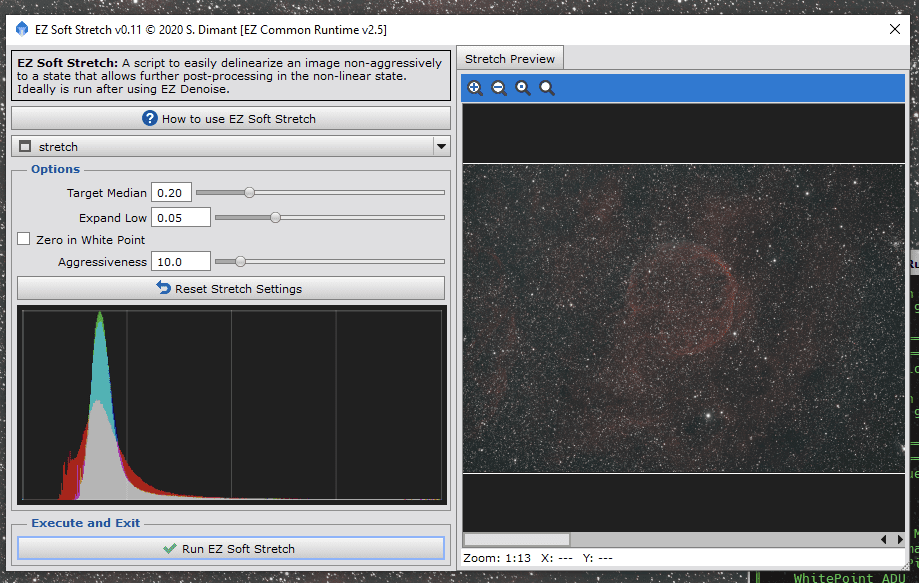
Defaults are great for me, click “Run EZ Soft Stretch”
It does a wonderful job of giving us a nice clean stretch – you can see nebulosity, the main remnants, good stars and a nice background. We still want to make things pop so we’ll keep working away.
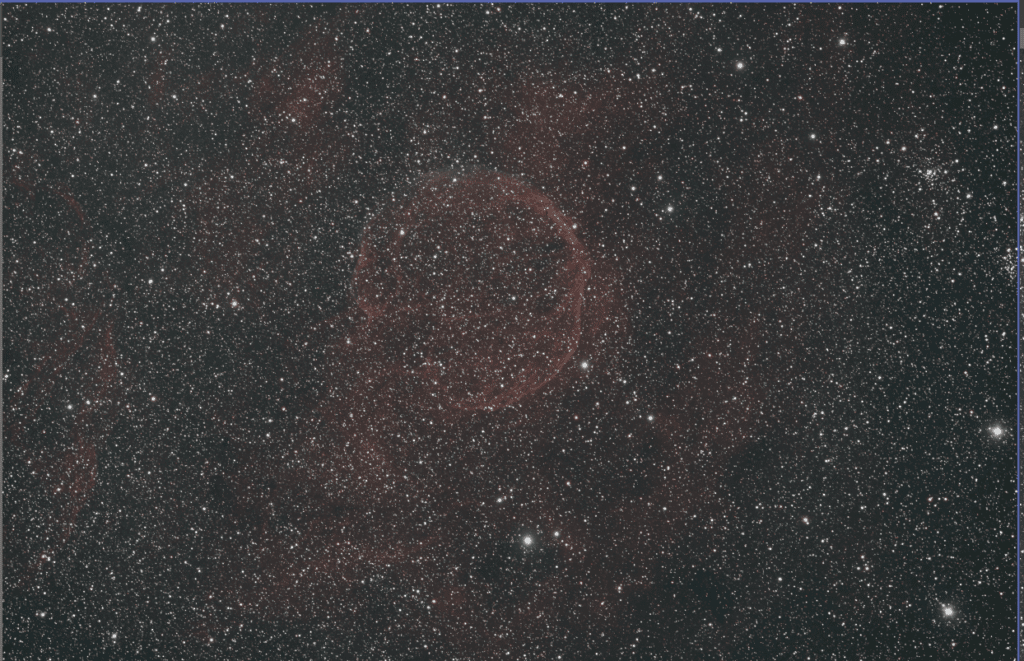
Step Seven – EZ Star Reduction
This step is optional and normally, i just leave stars as is, but in this region, there is just soooo many of them they’re almost distracting, so we’ll reduce them a bit. Again, running with the defaults seems to work well.
Before I run this, I duplicate my working image and call the new on “starless” just in case i change my mind i can go back to the step prior to this and try something else. In fact, I do that between many of my steps just as a good workflow.
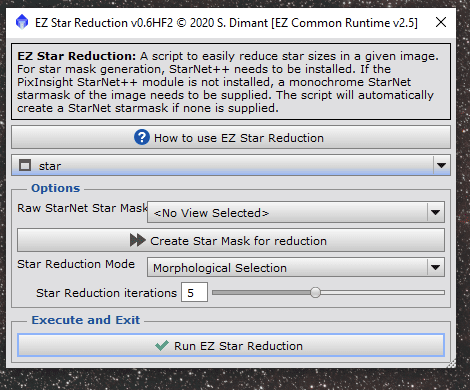
If you have a star net mask from a prior step, you can select the view of that existing mask. Otherwise, leaving it no view selected will have it generate another mask.
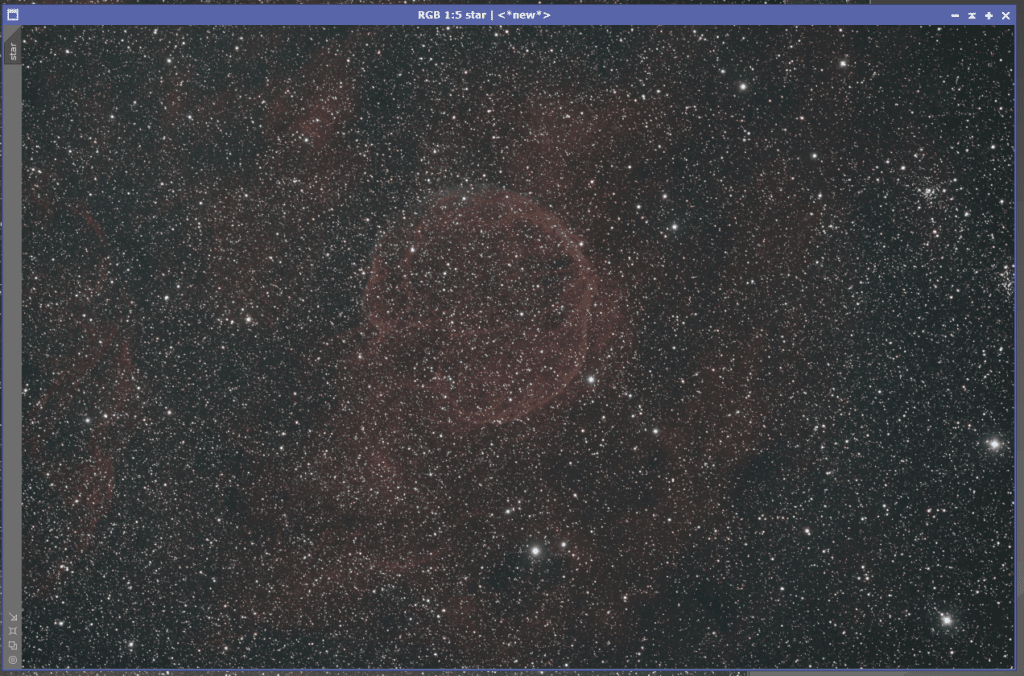
Before Star Reduction
After Star Reduction
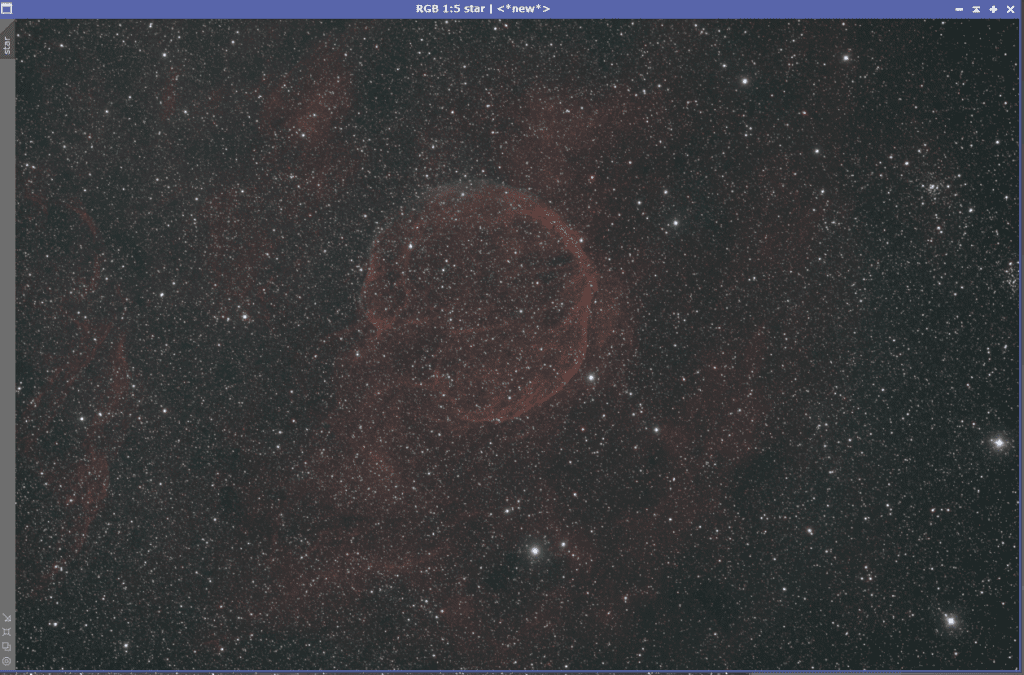
At this point, you can choose which one you want to continue with. I’d experiment around. You may be able to change some settings on star removal to help make it look a bit less “soft” – you may be able to sharpen or do other things.
We’ll continue with the star reduce image for the rest of this guide for now. I really like how CTB-1 becomes more visible when you soften some of the stars.
Step Eight – Creativity
Mess around with curves – Do some stretching. You can use curves to diminish some of the background and enhance the nebulosity. Abell 85 is a very diffuse/faint supernovae. It takes some experimentation to make it pop!
Experiment with to boost the faint tendrils – Exponential Transform may be able to make the nebulosity pop out against the background. Use the preview option to experiment. Sometimes multiple applications of smaller transforms are better than one big boost. Experiment!
Step Nine – ACDNR / SCNR
This can help you finish for cleaning up any remaining noise. ACDNR can help correct some remaining chroma noise in background and sometimes it’s necessary to run SCNR on green to remove the green. Just be careful! It may be better to experiment with color calibration and or re-shoot RGB stars to clean up green as running SCNR can reduce the brightness/color of data you do want to keep!
Step Ten – More to come!
This is just our basic guide/quick processing run through! We’ll update a Part 2 here soon to show how you can RGB split this and process it as HOO! More to come soon!
Share your Abell 85 / CTB-1 creations!
If you download & process this data, we’d love to share links to your compositions & creations. let us know in a comment below if you share on astrobin, Instagram or anywhere! We want to link out to people who use our data for their own creations. It’s what we do this for!
Pin It!