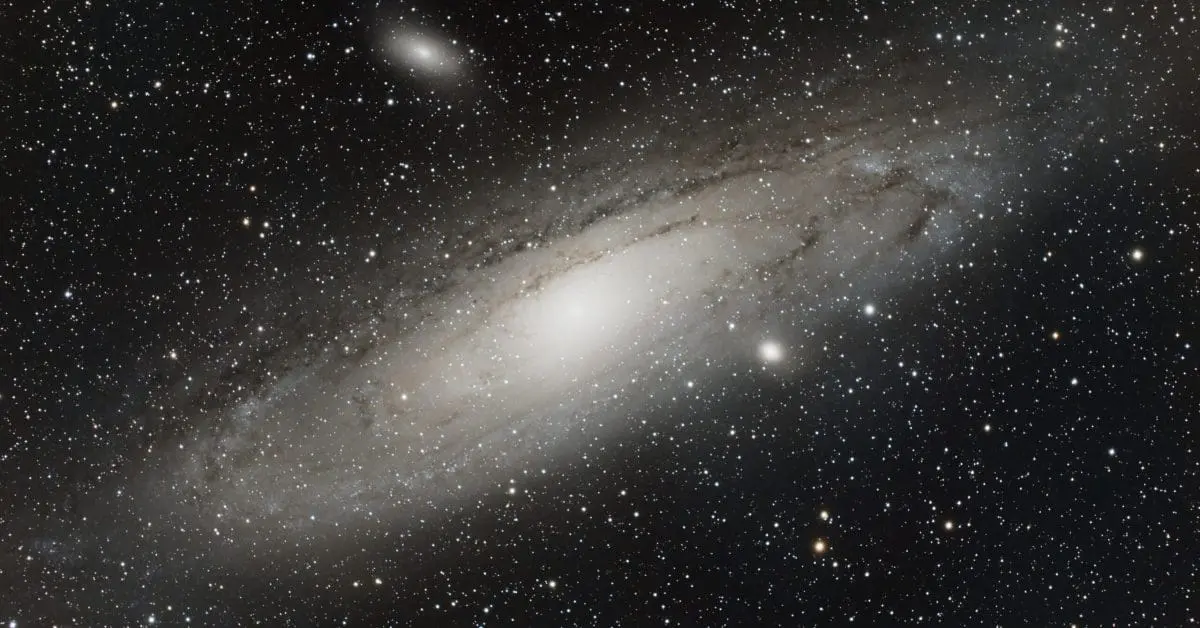
Living under the dome of light pollution, we often forget some of the majestic neighbors that grace our skies. M31 is one such wonder, that most living in light polluted will never see and always take for granted. Under dark skies, the naked eye can make out the smudge, binoculars can see the airy disc and simple telescopes remind you just how massive and close our cosmic neighbor is.
Enjoy Andromeda Galaxy and have fun editing it! Yes, we’re releasing the stacked fits, XISF and JPG as creative commons attribution license. These photos were collected in our Austin TX backyard. We hope to visit this galaxy again un a better sky (bortle two) and we plan to share those too!
M31 – Andromeda
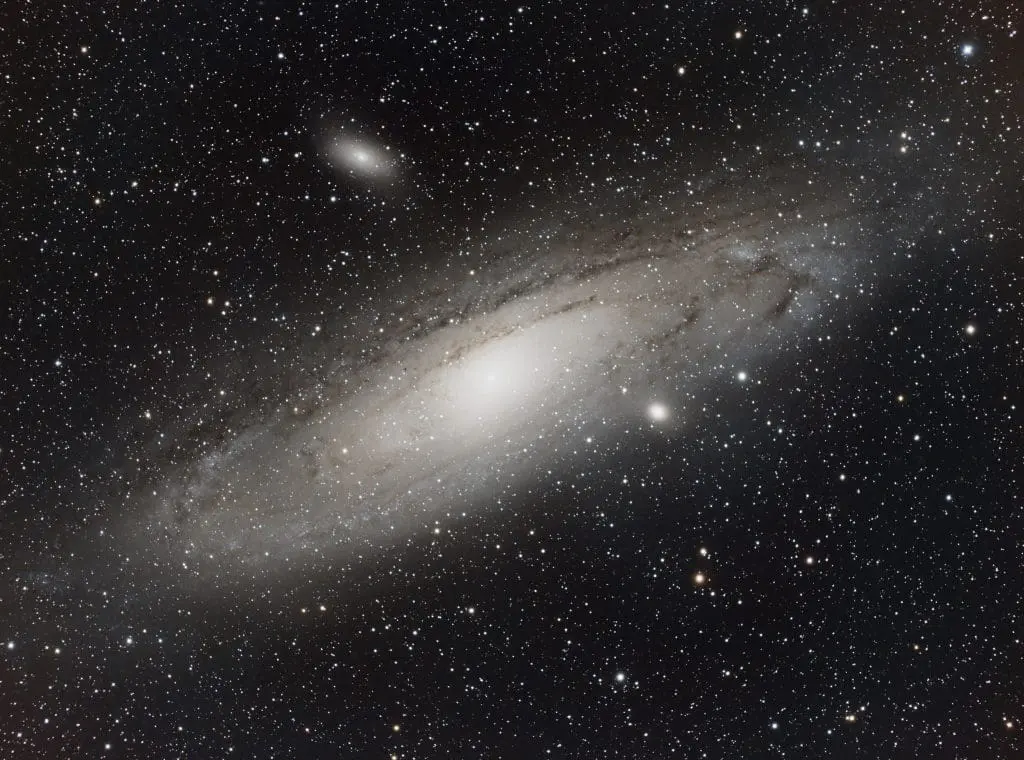
Please feel free to leave comments linking to your attempts at processing our free Andromeda Galaxy data and images!
Download M31

This work is licensed under a Creative Commons Attribution 4.0 International License.
The XISF and FITS have already been stacked and calibrated with flats.
If you would like access to the raw subs, Flats and Flat darks, please contact us and we’ll be happy to provide them.
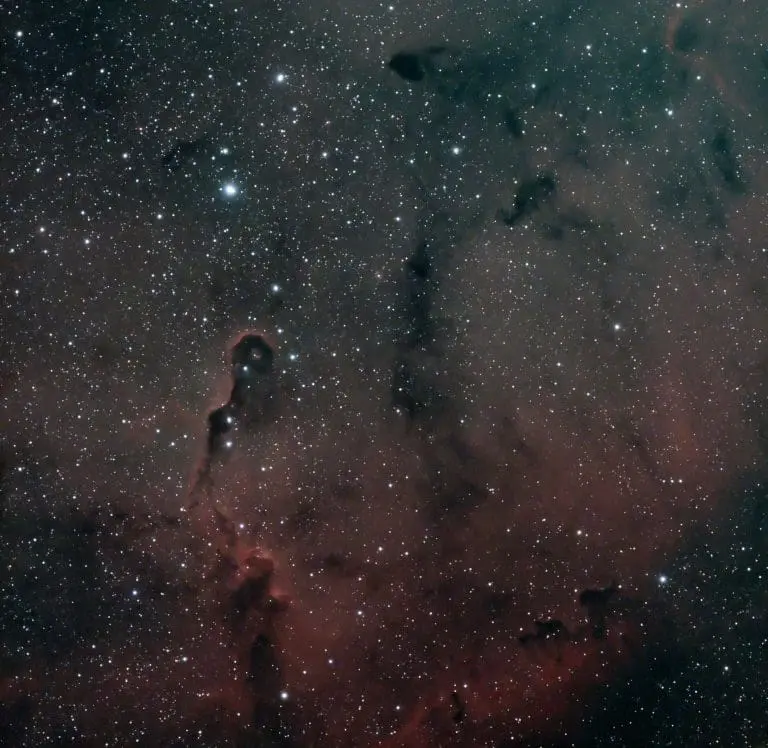
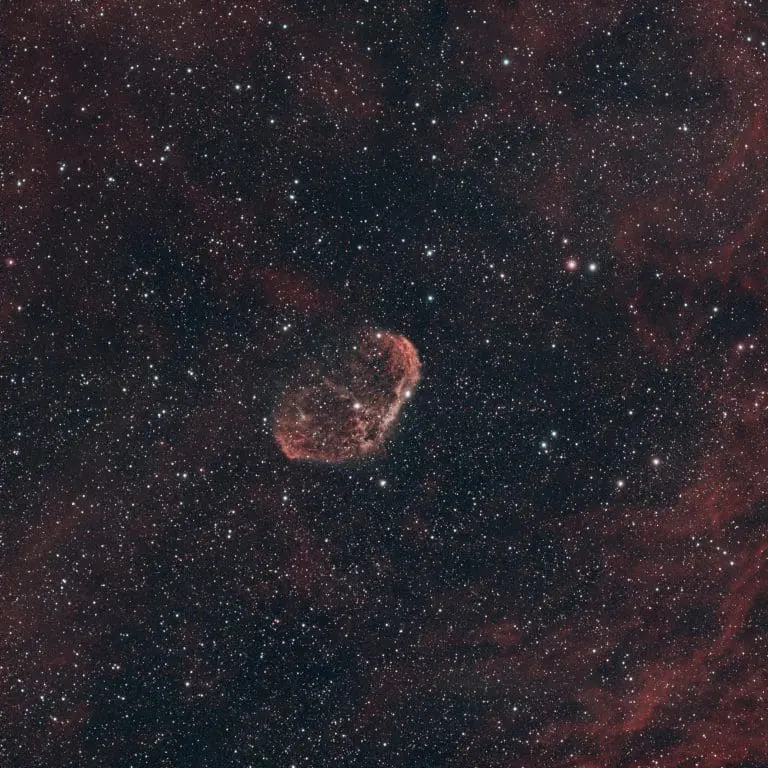
Want to try a more difficult image to process? Download our Sh2-129 Squid and show off your processing skills!
Processing
This data was collected on an ED80 Apochromatic Telescope with an APS-C ASI 2600MC pro sensor. Due to an issue with a flat field corrector, you may have to crop some of the edges. You can use star correction tools such as binarize, convolute and deconvolute and other techniques to repair these stars. I cropped some of it for our sample image, however, I felt it was a valuable experience to leave it out there so others may be able to share their experience in processing images like this.
It’s part of the growing pains of moving to modern larger format sensors 🙂
~bortle 6 or 7 skies
Group of 165 Light frames
BINNING : 1
Filter : NoFilter
Exposure : 120.00s
PixInsight Processing
Remarkably simple processing done in PixInsight
- Dynamic Crop
- DBE – Dynamic Background Extraction. Use the marks in the upper left corner and bottom right corner to remove gradient. This will remove the blue color (symptom of RGGB bayer and broadband imaging – and the fact ZWO had a bug with invalid white balance that we have since fixed!)
- Color Calibration
- Deconvolution
- EZ-Denoise
- EZ-Soft Stretch
- scnr (green)
- Some light “Curves” to diminish rest of gradient and darken some of the dark nebulosity.
- Enjoy
The “EZ-Suite” simplifies complex deconvolution, masking, denoise and other steps. You can download it here.
Step One – Dynamic Crop
I’ve updated this guide recently to change things around. We’re going to start with a dynamic crop first to remove some star alignment artifacts and poor data. This helps in the step #2 because some of the gradient issue we experienced was because of data that should have been cropped out.
Open Dynamic Crop and drag the square to focus on the main image. You can shrink it down a tad more to remove some more of the corner stars which were pinched/out of focus (backspacing issue on old scope)
Step Two – Remove Gradients
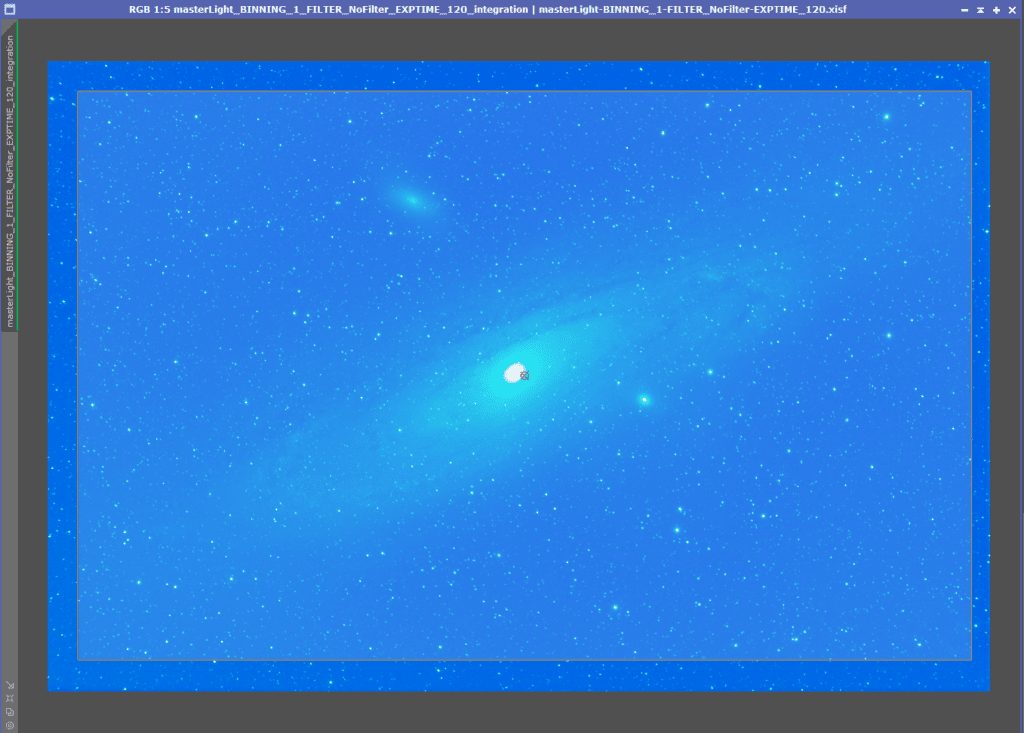
When you open our FITS or XISF and “boost” the image (stretch it) you will see something like this
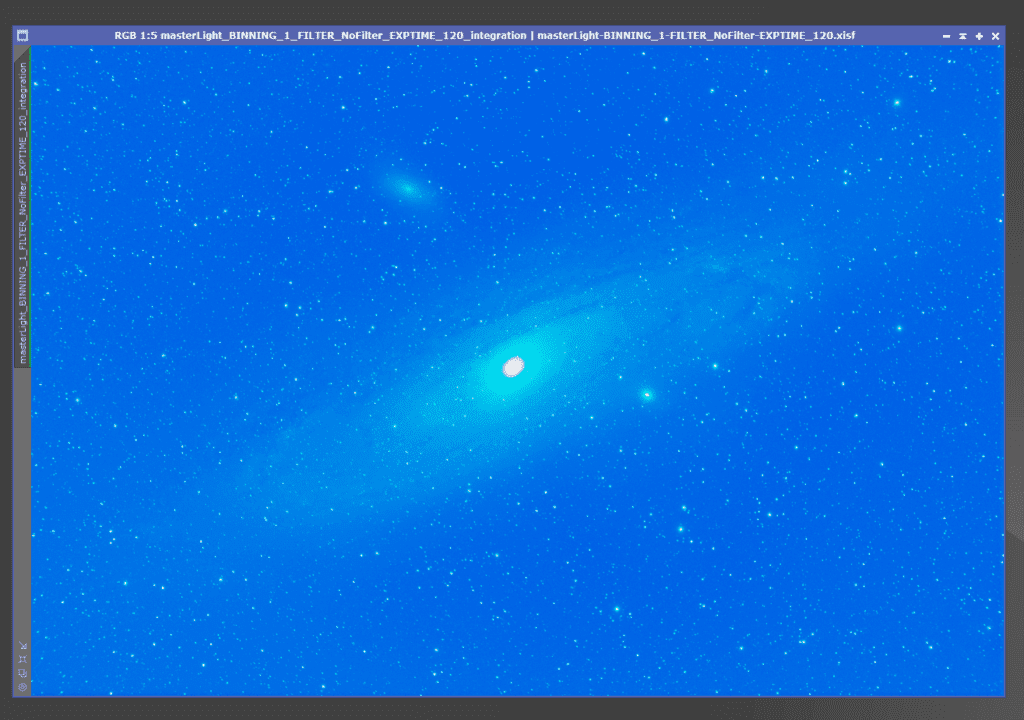
Don’t fret! We can remove the blue with Dynamic Background extraction
Let’s launch DBE (shortened as i’ll type it a lot) and select some smartly placed points for it to remove gradient. Keep in mind that Andromeda is HUGE and you don’t want to remove any of the faint nebulosity across any of its disk.
We do NOT want any gradient markers in this highlighted area. Avoid any placement here!
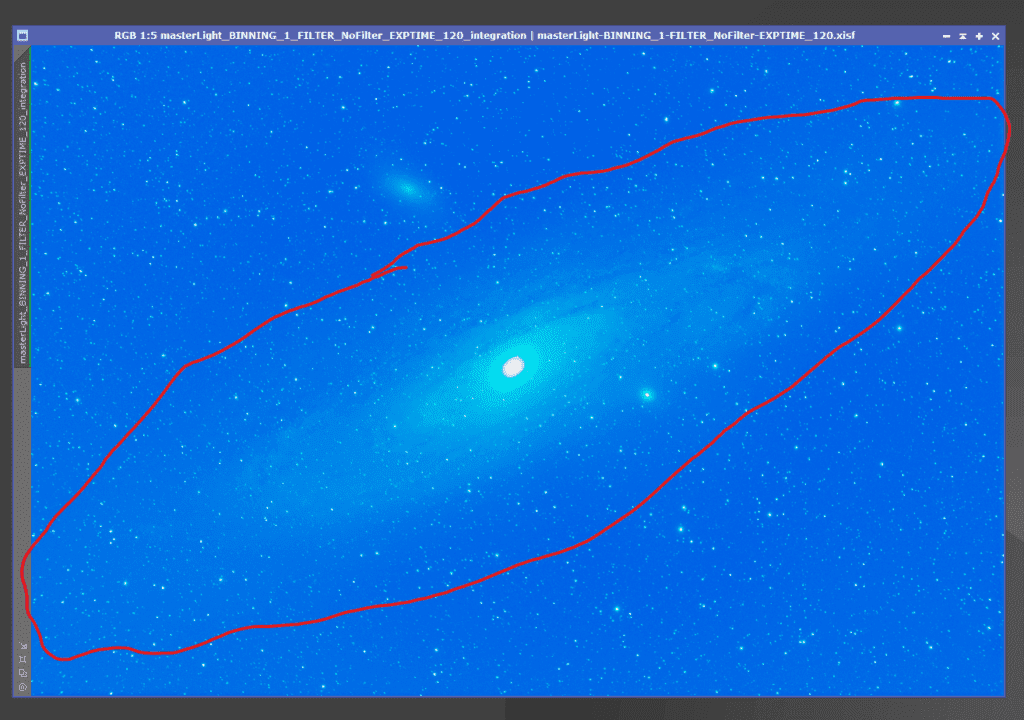
Here are my DBE points.
On a great image without much light pollution “less is more” is my rule of thumb – but our data was from a B8 sky so we must be a tad more aggressive since there are multiple gradients.
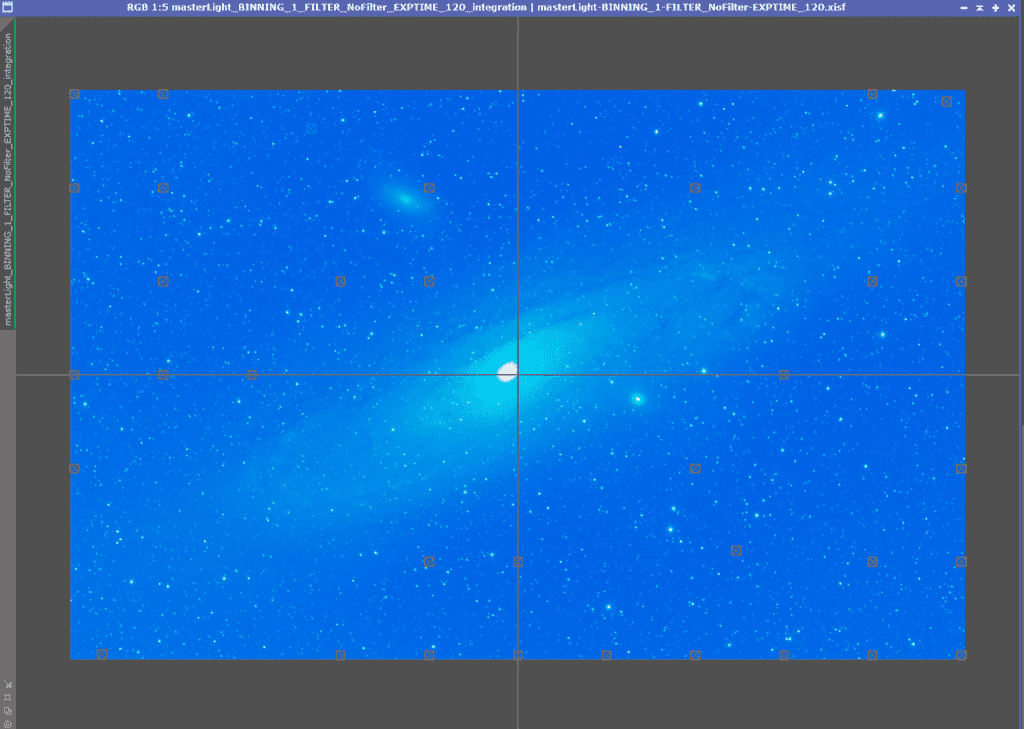
Here we go with Gradients removed (well, the obvious ones)
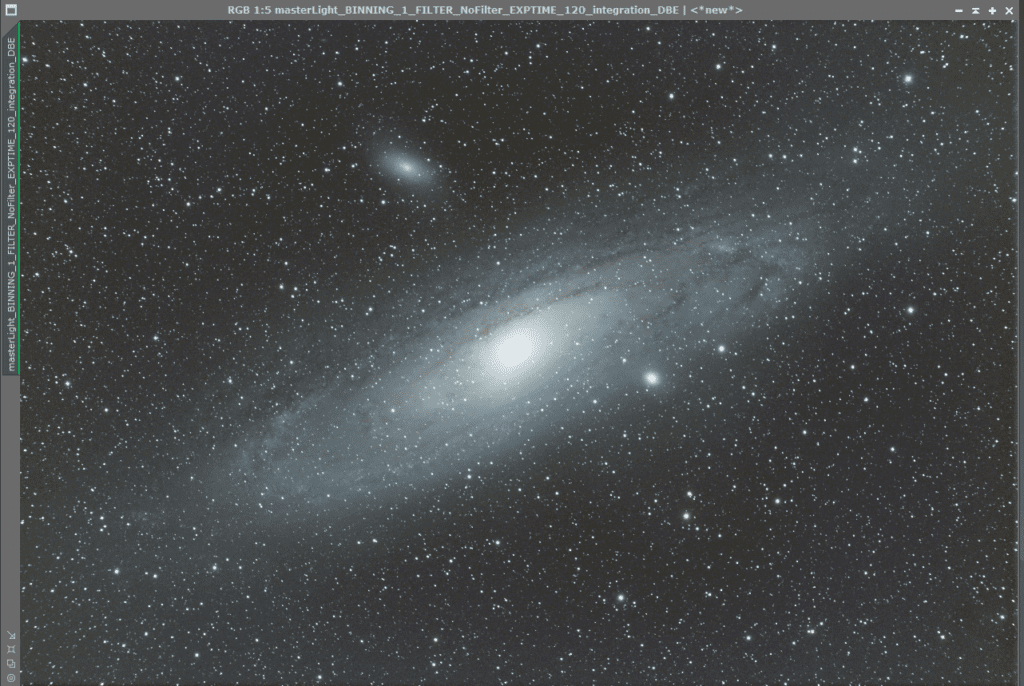
You can clearly see a lot more of the galaxy & texture.
Step Three – Background Neutralization
Find a starless/nebula free/galaxy free area and create a preview (alt-N & drag a square)
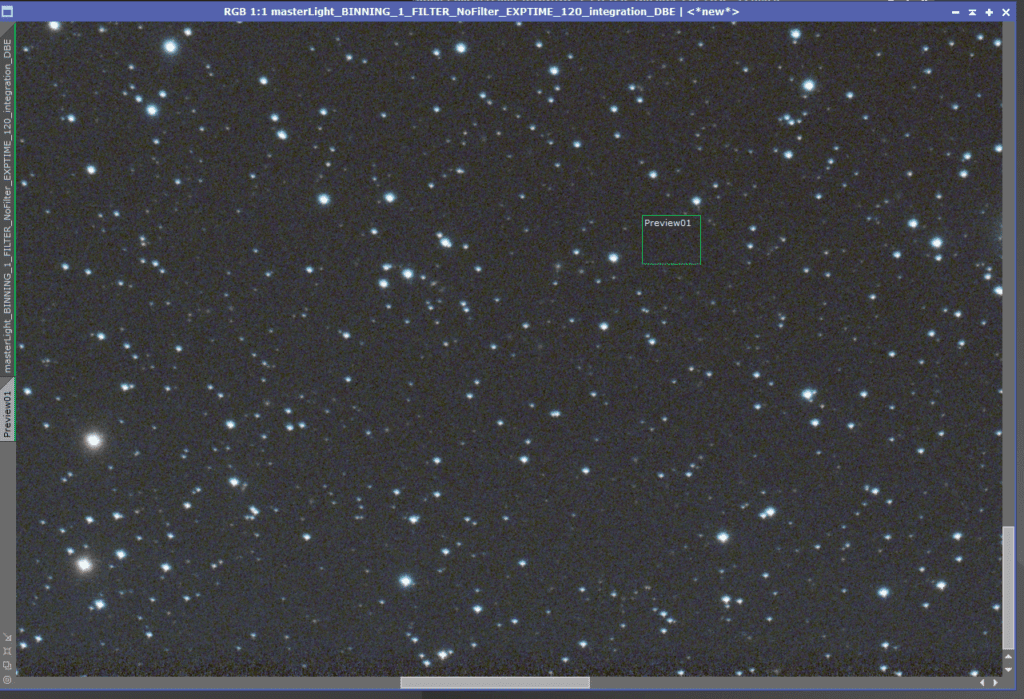
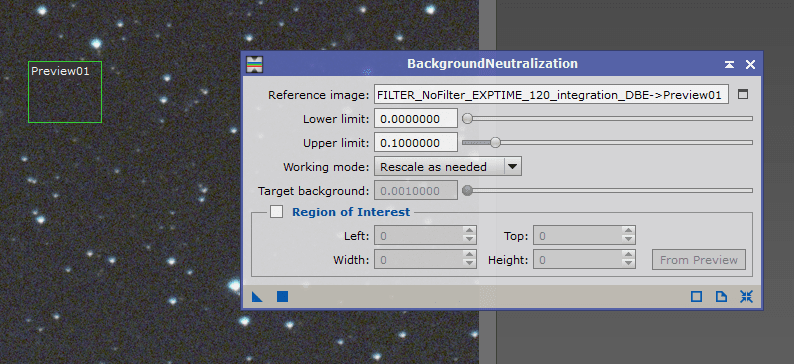
Select that Preview in Background Neutralization and apply
Step Four – Color Calibration
let’s clean up some of the colors. By now, it’s apparent this image was over-exposed – 120 seconds was a bit too long for each sub as colors were washed out a bit – but we’ll keep working. We can make a cool image 🙂 I share everything I do in hopes it helps others learn!
We’ll re-use the preview of Andromeda Galaxy and put that in the Reference image.
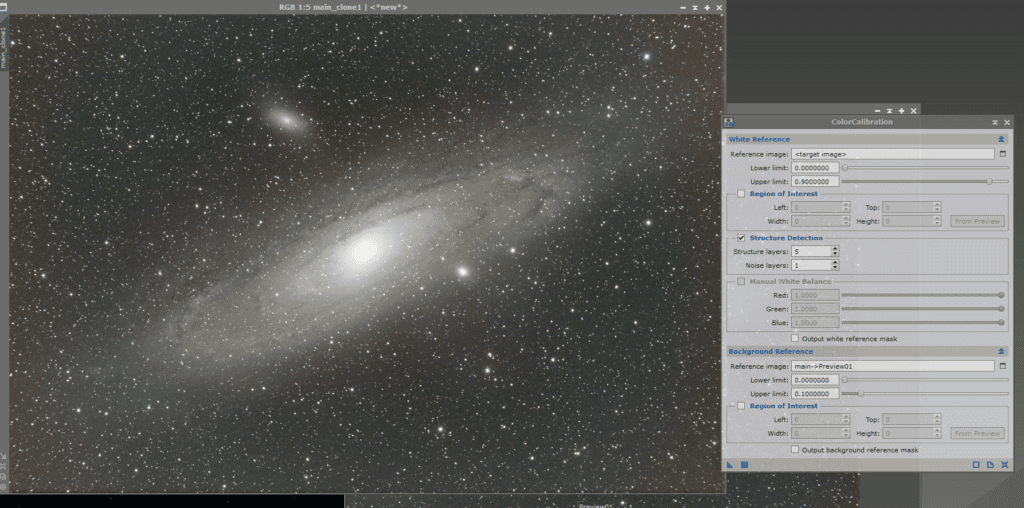
If you wanted to see what high bortle skies look like, this is it. You can still see some gradient, but we’ll keep processing!
Step Five – Deconvolution
Deconvolution will help us sharpen things up a bit. Sometimes it’s not very apparent but I like to run this all the time because EZ Suite makes it so easy it’s no longer a hassle.
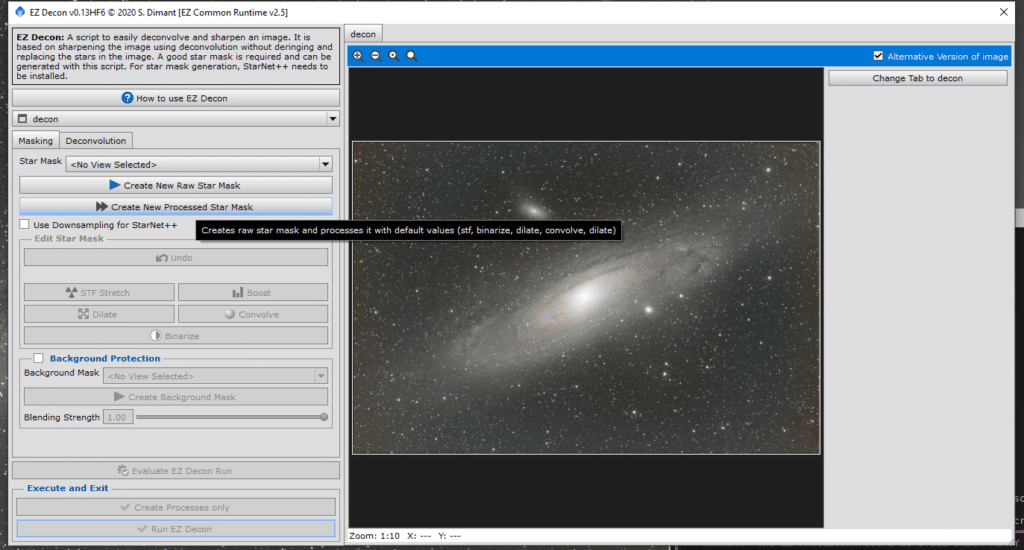
Be careful with the center of the galaxy. I’d recommend you edit the generated star mask and add an ellipses around the galaxy core. Decon won’t do anything there but it can cause “blow out” if you don’t mask the core.
Like this
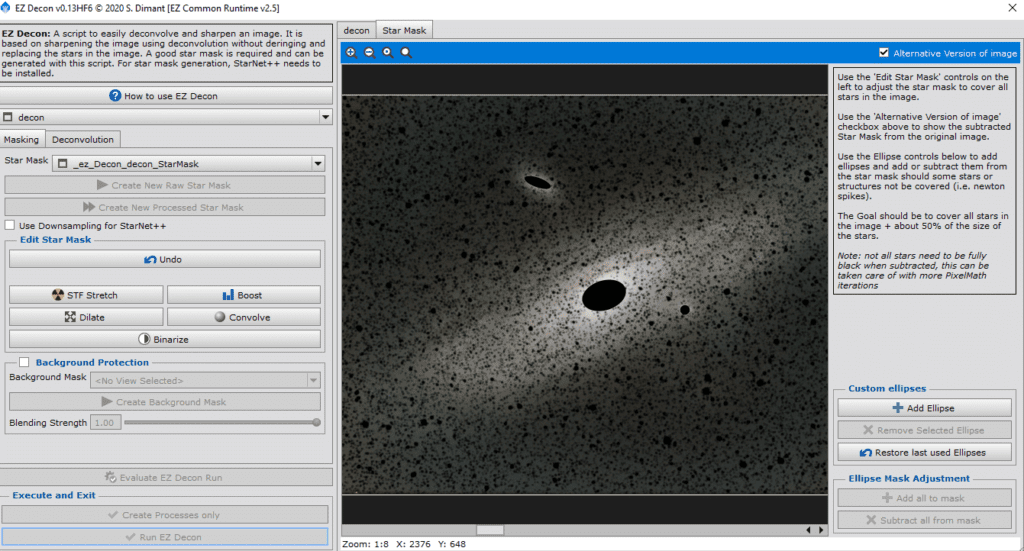
Click on “Deconvolution” and generate your PSF and then click “Run EZ Decon” to let it rip! We protect the core of M31 Andromeda nebula since deconvolution can “blow it out” if not careful!
Step Six – Denoise
Let’s remove some of the noise. I realize we still have some gradient here, but we’ll try and work around it or see if we can clean up some of the gradient by messing with curves and screen transformation function
Select your image in the dropdown and click “run EZ denoise” and go grab some lunch.. it takes a while.
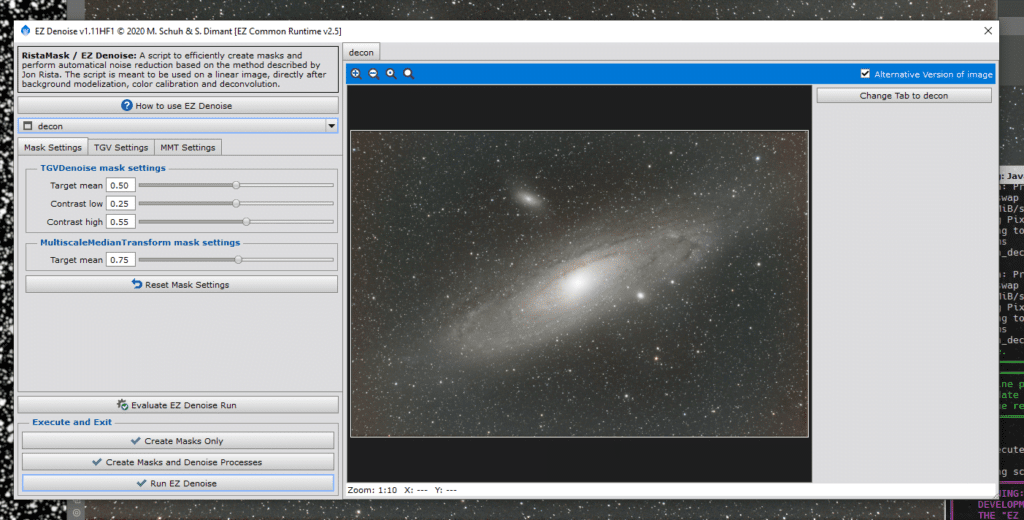
Post denoise – cleans up nicely
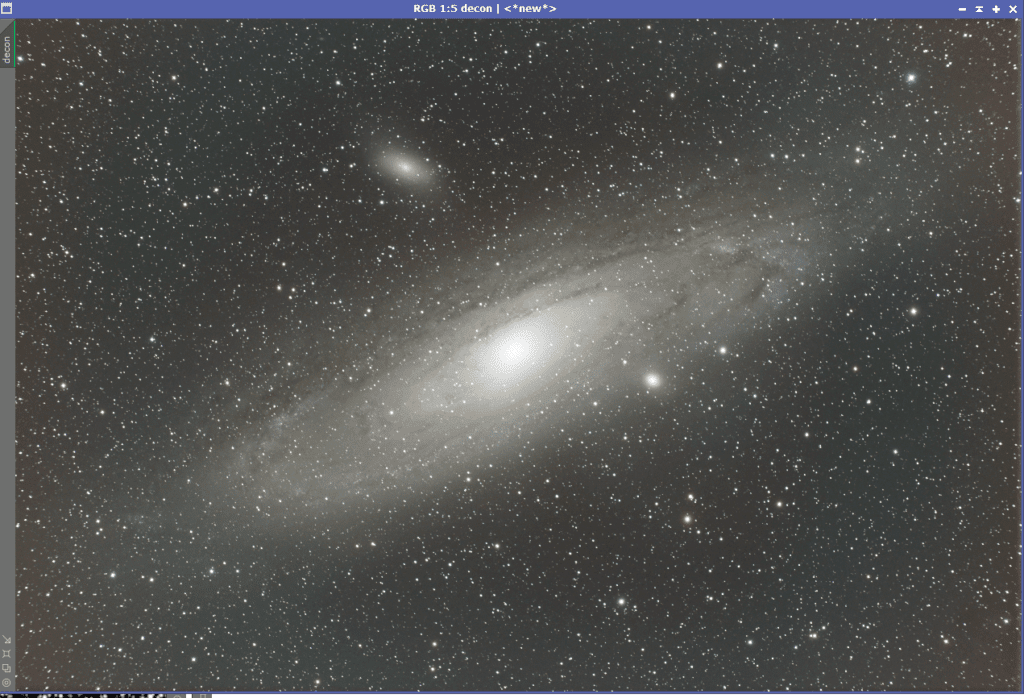
Step Seven – Soft Stretch
Let’s “Soft Stretch” and switch out of linear edit and see what we got
EZ soft stretch
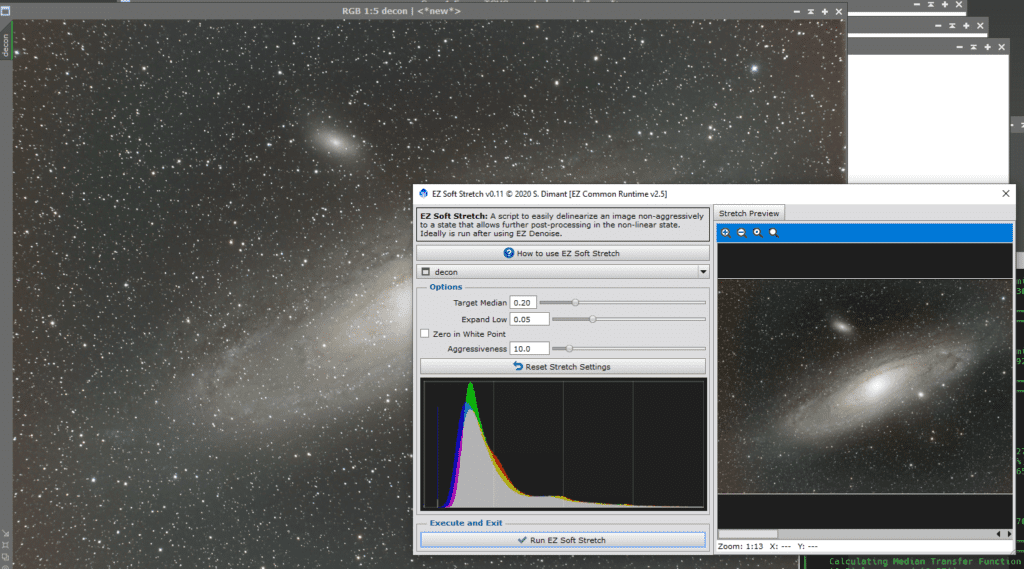
Post stretch
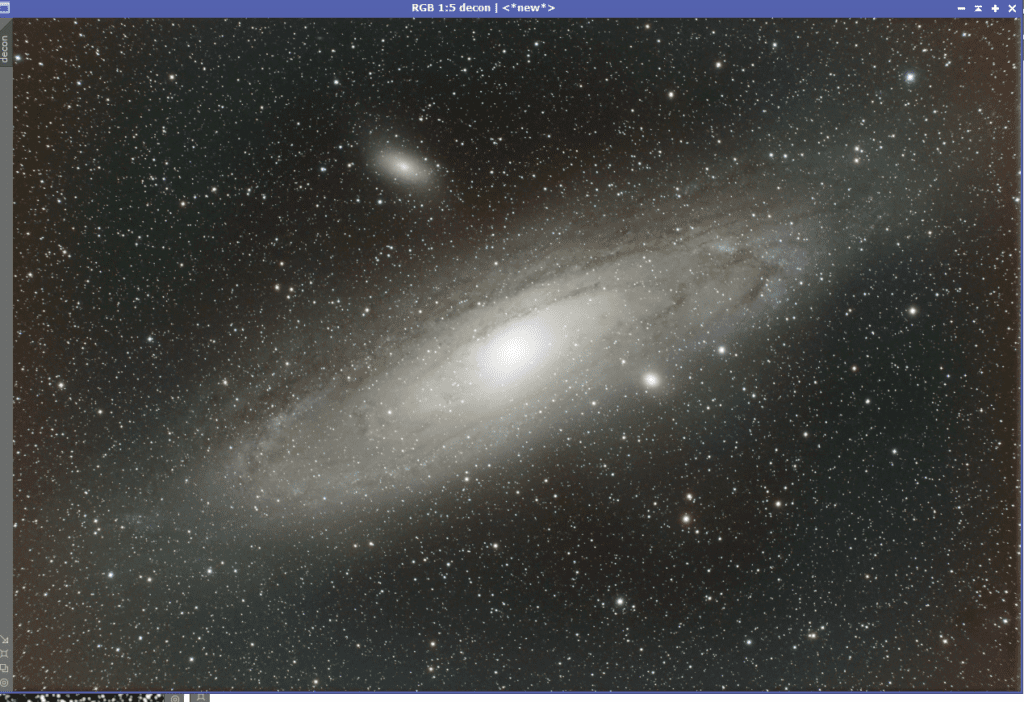
It did a good job of giving ups a nice stretch – you can see a slight green hue – but i think SCNR can nuke that – so let’s do that!
Step Eight – SCNR
Let’s remove some tint
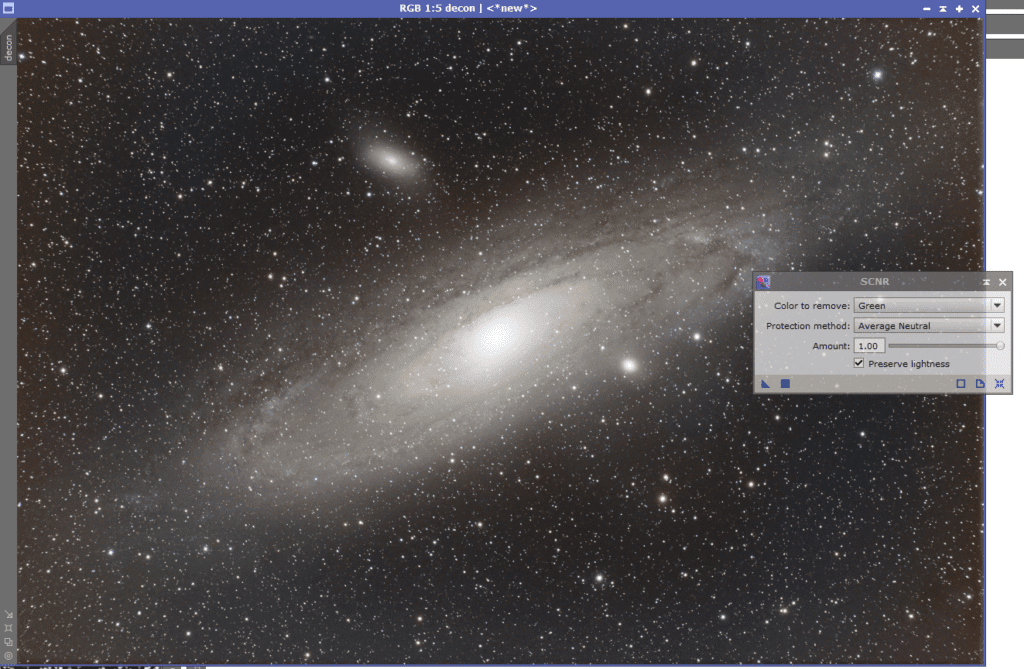
It removed the green, but we still have some gradient there. For now, we’ll cheat and use curves and histogram to clip it.. I know.. I know… If you’re a purist – I’d go back and DBE again. But humor me 🙂
Step Nine – Curves
Experiment with making some things Pop
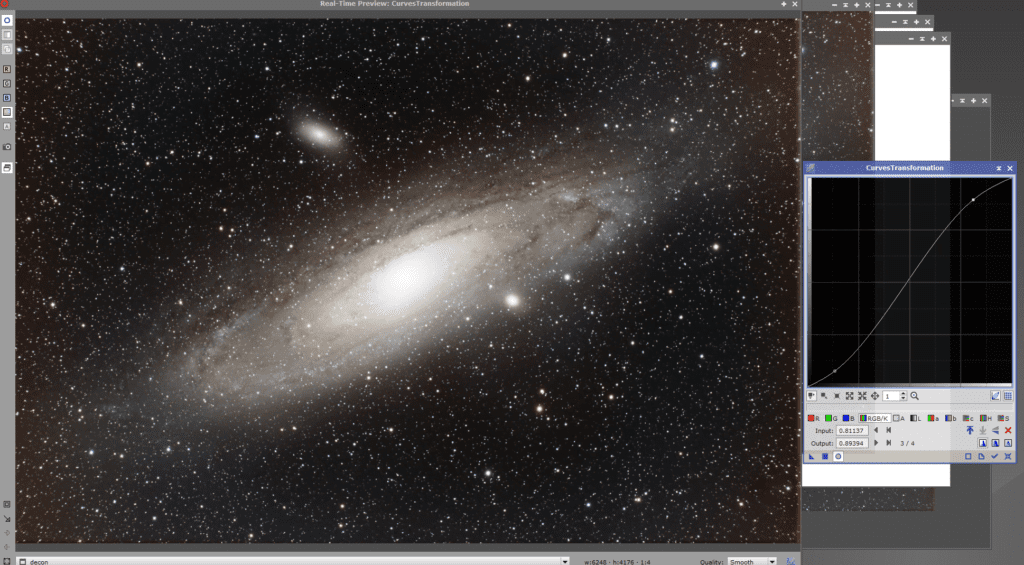
Not too shabby!
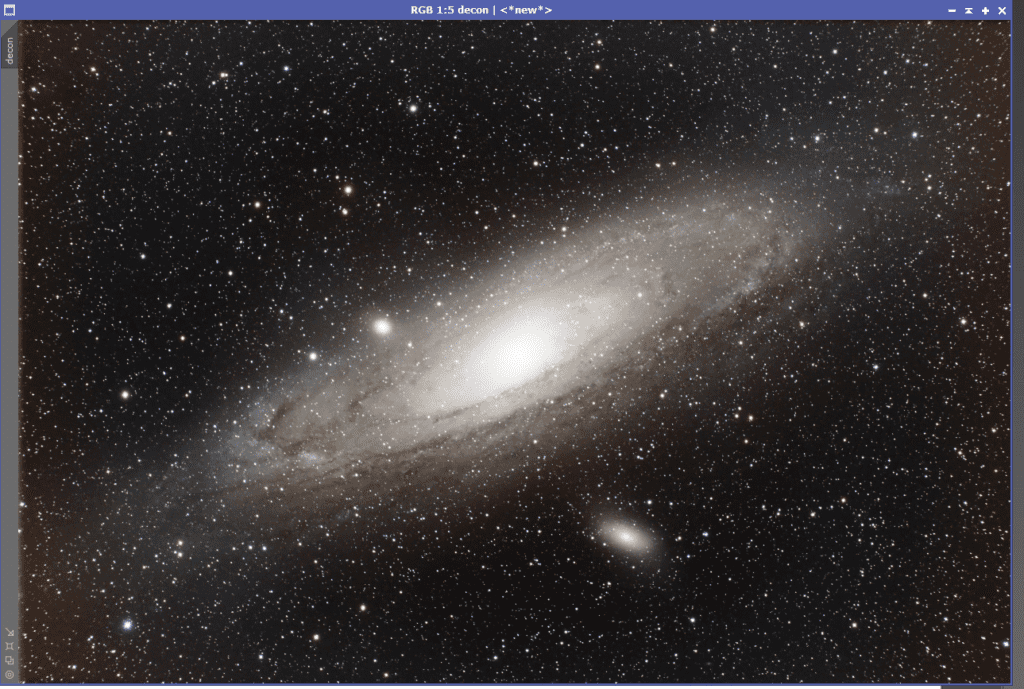
Step Ten – Rotate
People love it in this perspective – lets flip it 180 degrees
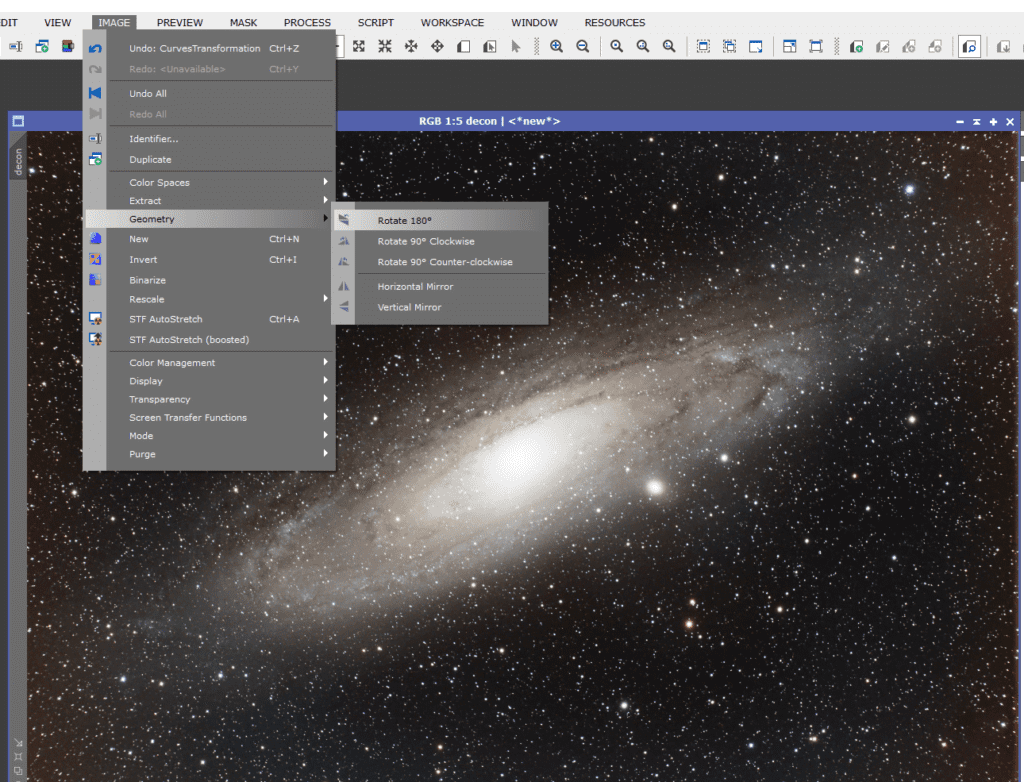
Here we go! This is one of the most shared framing of Andromeda Galaxy.
Step Eleven – Finish it up
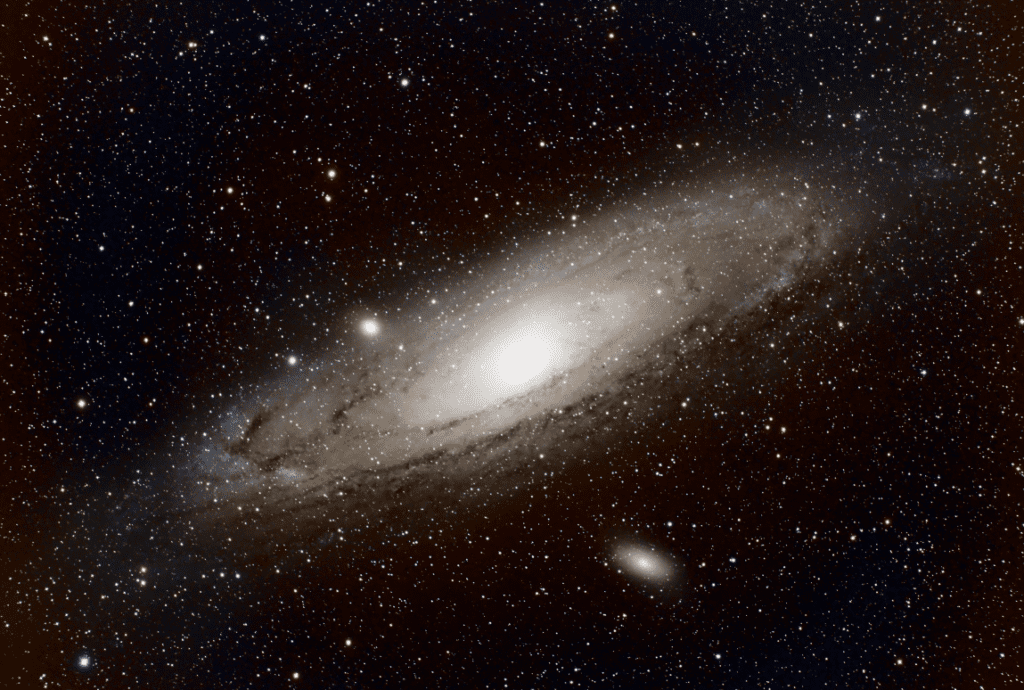
There are a lot more steps you can do to really make this pop, but we wanted to just show the basics. We recommend you experiment with masked stretch, photo color calibration, Morphological Transformation, ACDNR noise removal, Exponential Transformation.
You can also try StarNet to remove stars – work on flattening background. You can shoot a few shorter subs for RGB stars to try and get some more color on those.
Experiment around and share what works for you! We love seeing what creative ways people can tease out data from the Andromeda Galaxy.
I cheated a bit with curves and lost some of the outer galaxy to compensate for the light pollution gradient
New M31 data to come!
This was shot on my old telescope/setup – I had “pinched optics” and bad spacing on my reducer – thus the stars aren’t entirely round, and some have a diamond. It turns out you do NOT want a compression fit adaptor on an Astrophotography imagine train!
The new data will be shot from our dark sky observatory and we’ll share it once we get it collected! We plan on shooting on a new moon and during a bright moon to share the difference & experience of using no filters (just UV/IR) and the L-Pro Light Pollution filter.
We may even try an NBRGB re-mix – capture the narrowband data and integrate it with RGB to get some of the heavy Ha areas in M31.
Share your Andromeda Galaxy processing
Please leave a comment with your version of M31. We’d love to see what people can do with this data. We’ll be happy to release more data into creative commons if people find it useful!
Pin It!
