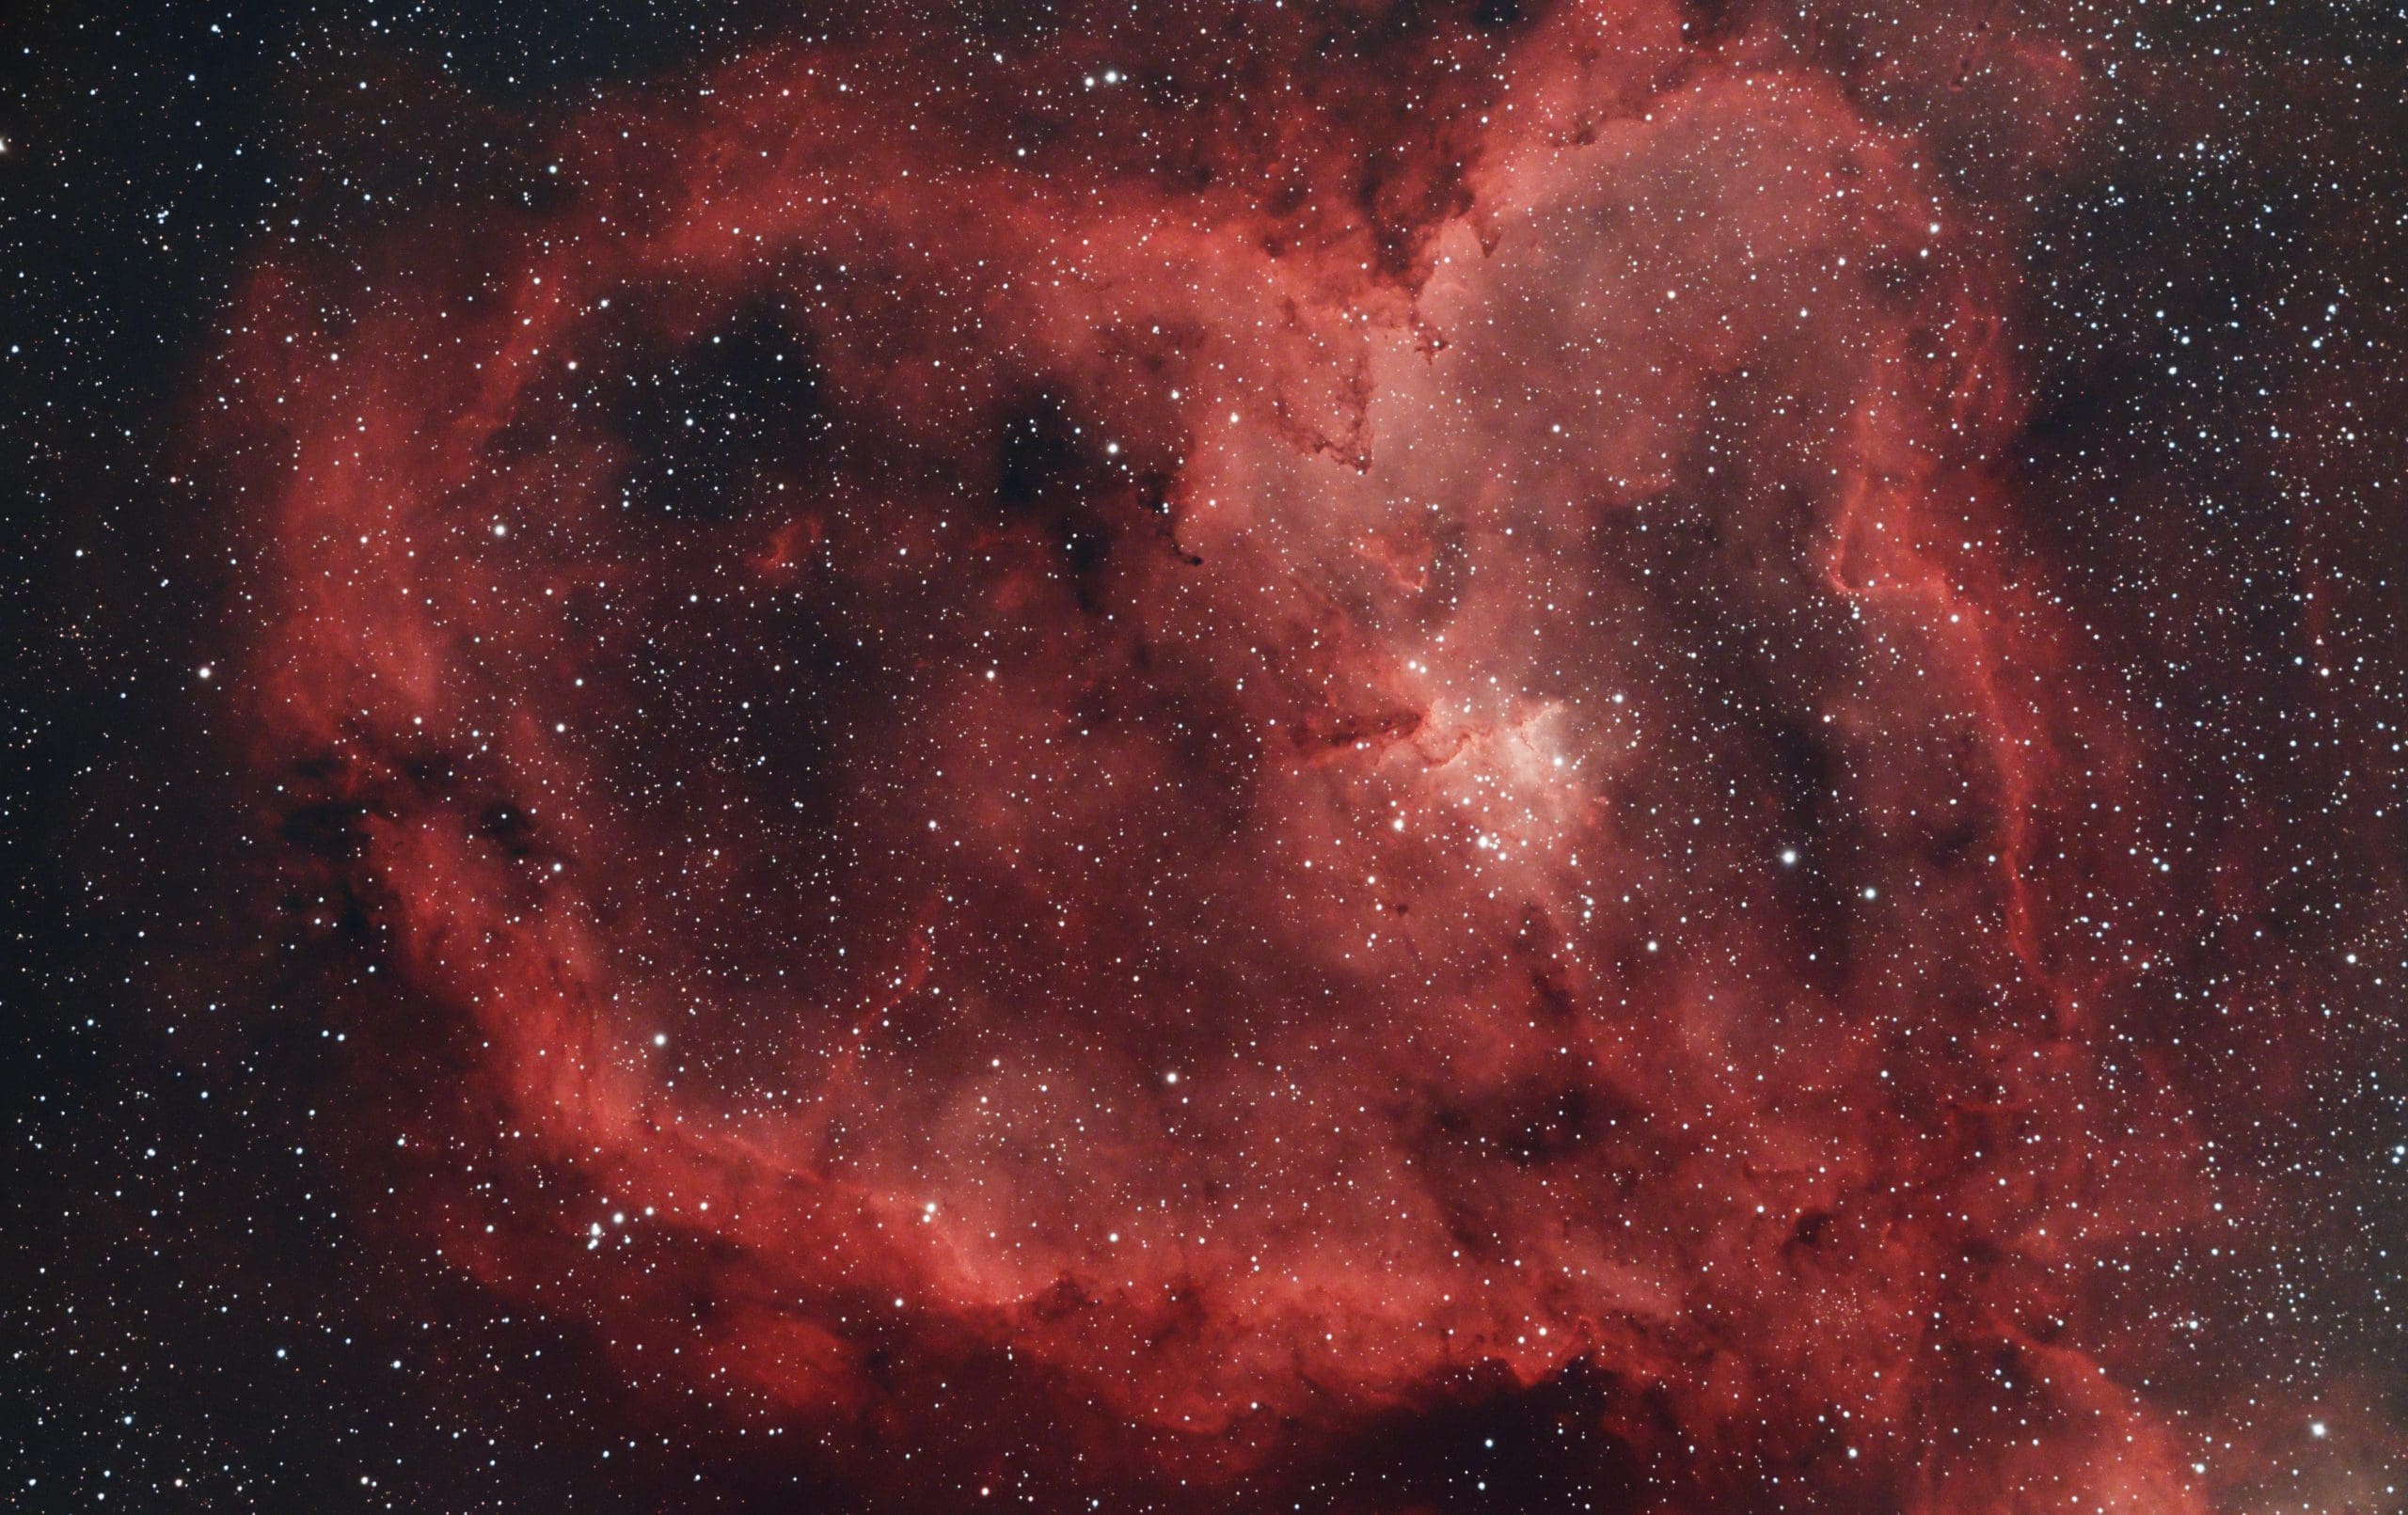
The Heart Nebula, IC 1805, Sharpless 2-190
What a lovely nebula to share with the world right? Why not work on your own rendition of this beautiful nebula a short 7500 light years away from Earth located in the constellation Cassiopeia.
In this guide to the Heart Nebula, we’ll show you how we captured it, processed it and share the data with you to experiment and learn with through the Creative Commons Attribution License. This page will be a “Living page” – I tend to keep content updated and guides current as much as I can. It’s my hopes I can loop back around and provide this guide with Open Source and Free Software solutions to Stack & Edit so please be sure to bookmark and check back for updates!

Imaging
The heart nebula was acquired over two nights in our Austin TX backyard observatory. We sequenced 140 images of three hundred seconds long (5 minutes) and calibrated the images with Flats, flat darks and integrated them in PixInsight with bayer-drizzle.
- Esprit 120 reduced to 545 mm FL (Apex .65x reducer)
- 2600MC Pro Camera cooled to -10c
- EQ6R Mount
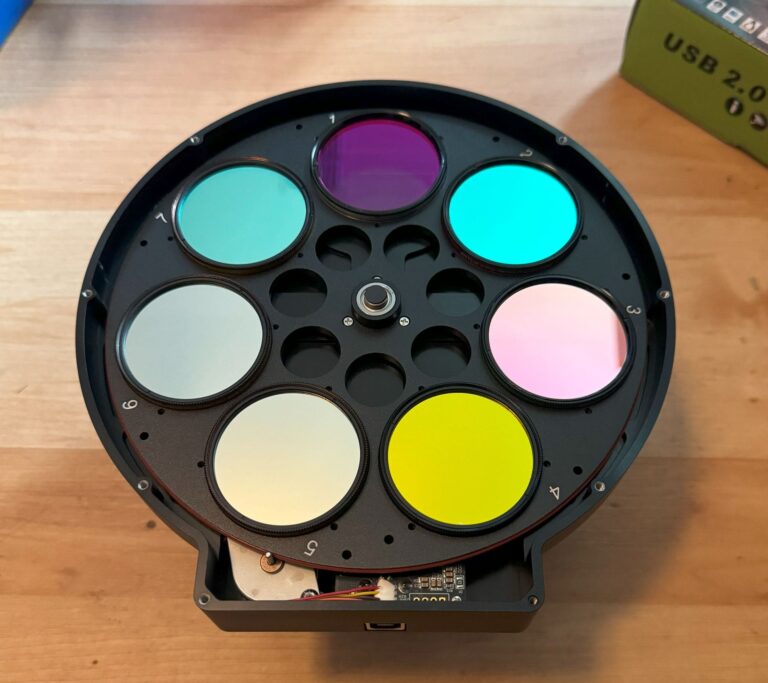
- Triad Ultra Quad Narrowband Filter (Ha,Hb,SII,OIII) ~4nm each channel
Acquisition Dates:
- 09/07/2020
- 09/25/2020
Heart Nebula Data Download
Download the Heart Nebula stack and experiment with our data. This XISF is huge – just shy of 1gb, if you want a smaller file or don’t use PixInsight you can download the FITS data.
I left the two noise removal subs included in the XISF so I could speak to them as an educational effort – more on that below in the processing section. You will need a computer running PixInsight (there is a 30-day trial available) and at least 16gb of ram or more to edit these. These are APS-C sized images – 26.1 megapixels captured on an “OSC” cooled astrocam. (One Shot Color)

This work is licensed under a Creative Commons Attribution 4.0 International License.
The XISF and FITS is stacked and calibrated with flats and bayer-drizzled in PixInsight for calibration & stacking.
If you wish to experiment with individual calibrated subs, please contact us and we’ll be happy to share them with you!
Processing Workflow
Download our integrated stack and open it up with PixInsight. You should see three images pop up. Two of them can be closed since they’re just showing the integrations noise removal but i left them in the stack for posterity. You can close the rejection high and rejection low images (you can see our camera rotation in the master low – more on the later), we’ll focus on the master light
If you don’t have the “EZ Processing Suite” please read here on how to download & install
Step one – Dynamic Background Neutralization
Dynamic Background Neutralization will remove the green hue of the image and any gradients from light pollution. We use “DBE” because it seems to do better than running Automatic Background Neutralization (ABE). Be sure when adding DBE points that you do NOT put any points on stars or nebulosity. It’s often good to look at images online to make sure that you’re not putting points on areas that you want to keep.
With DBE, “less is more”
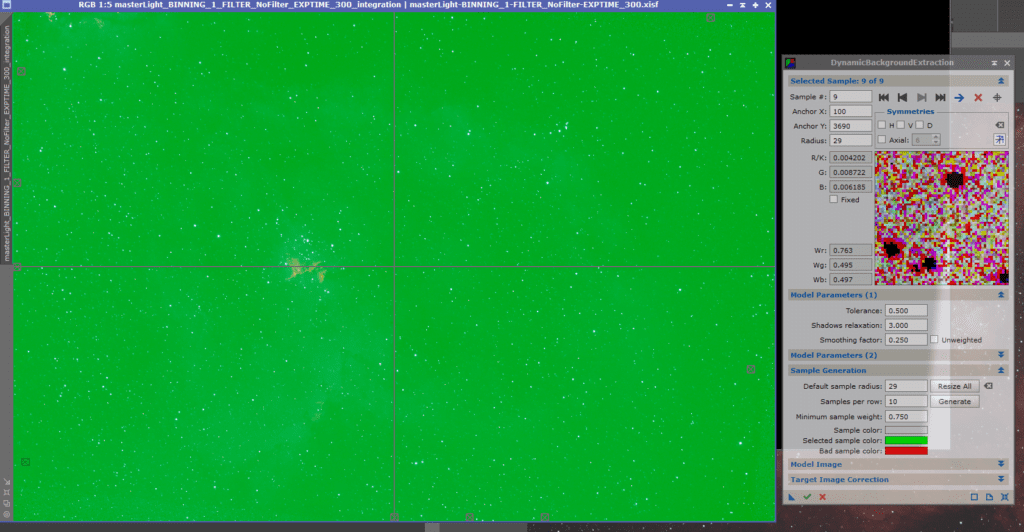
BTW, the green is partially from using our Triad Narrowband filter but also the fact of shooting exposures with RGGB cameras. Green is what captures much of the luminance data our eyes see so there is lots of green. We just use PI to process it out and get back to the colors we want to focus on.
Once DBE is done you end up with something like this
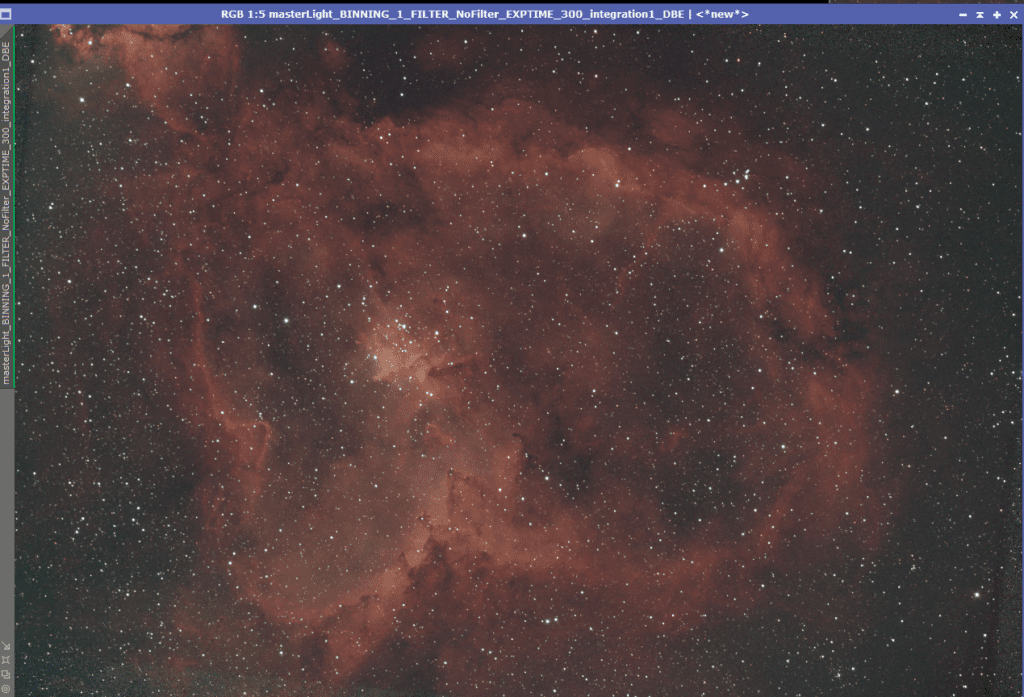
Look at that! It’s starting to look like an astrophoto already! BUT, if you look closely, you can see some noise where the rotation of the frames doesn’t line up. Let’s clean that up.
Step two – Dynamic Crop
We swapped out some of our image train between nights that this target was acquired so there is some unfortunate rotation in the sub exposures between nights. Instead of worrying about it, we felt this would be a great experience to learn how to crop it off and see the impact of camera rotation over multiple nights. Live and learn – we’ll still get a beautiful image out of this stack!
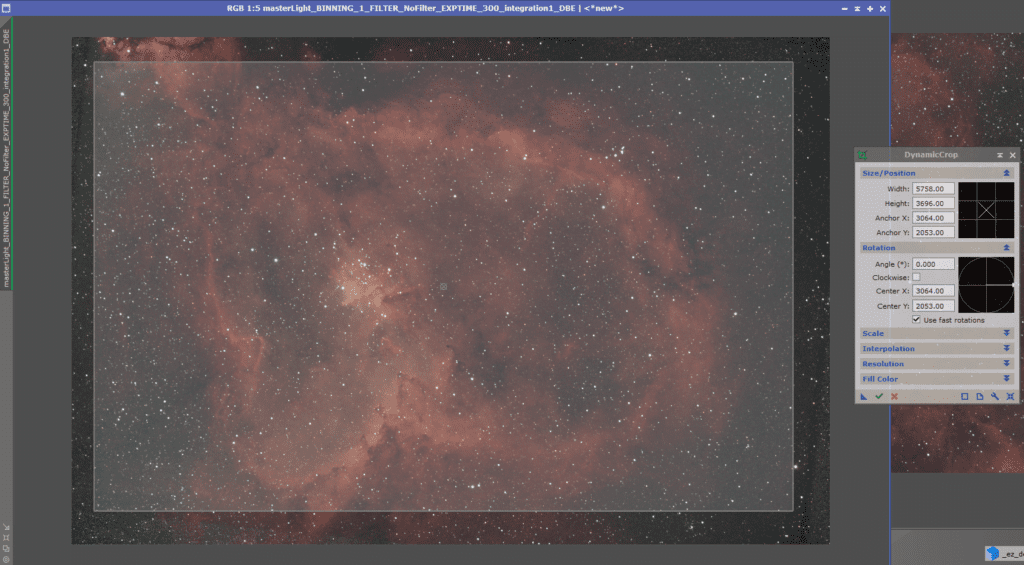
Once cropped we end up with an image like this:
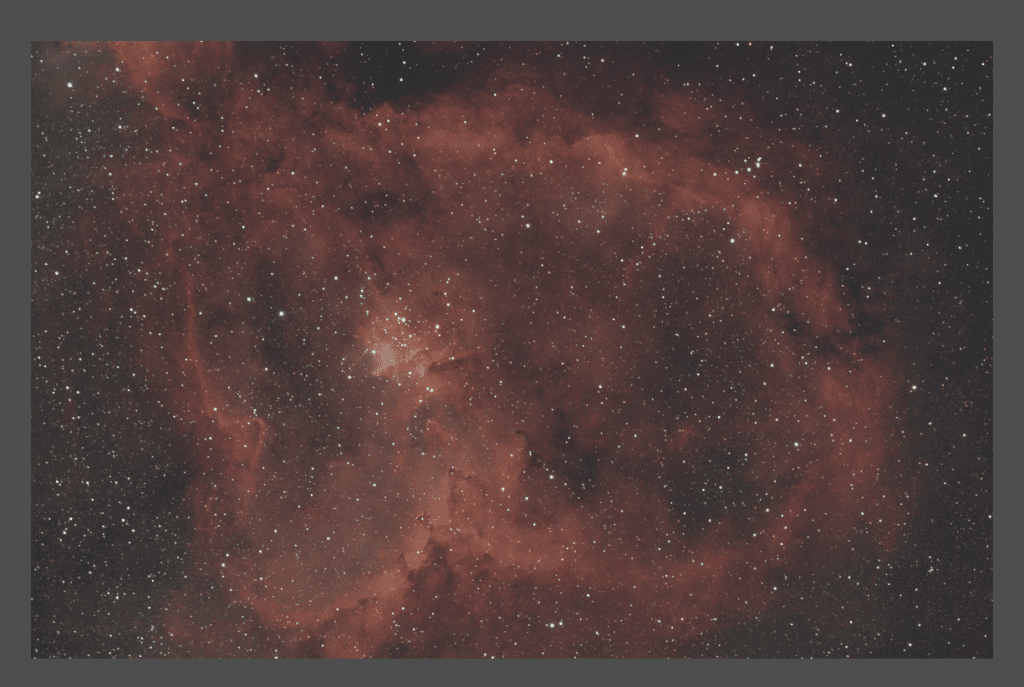
Much better!
At this point, lets flip it 180 degrees. This was shot on an Apo and without a diagonal to correct the image, we can flip it. BTW, I’m not 100% worried about this. There is no direction in space, but since it is the heart nebula it is nice to see it in the familiar heart pattern
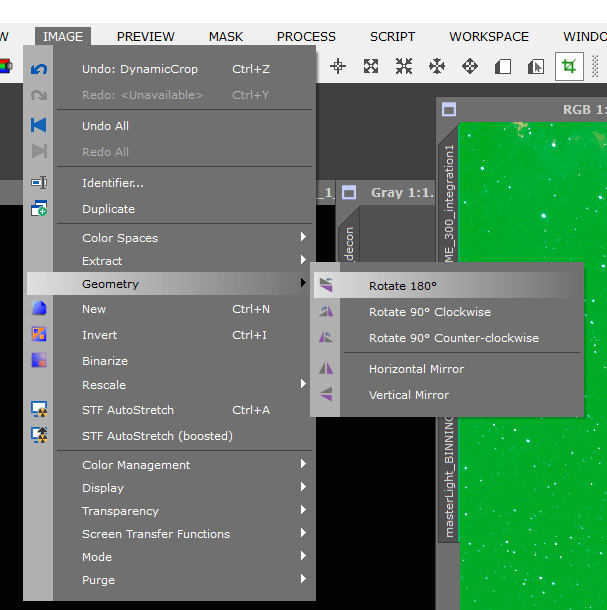
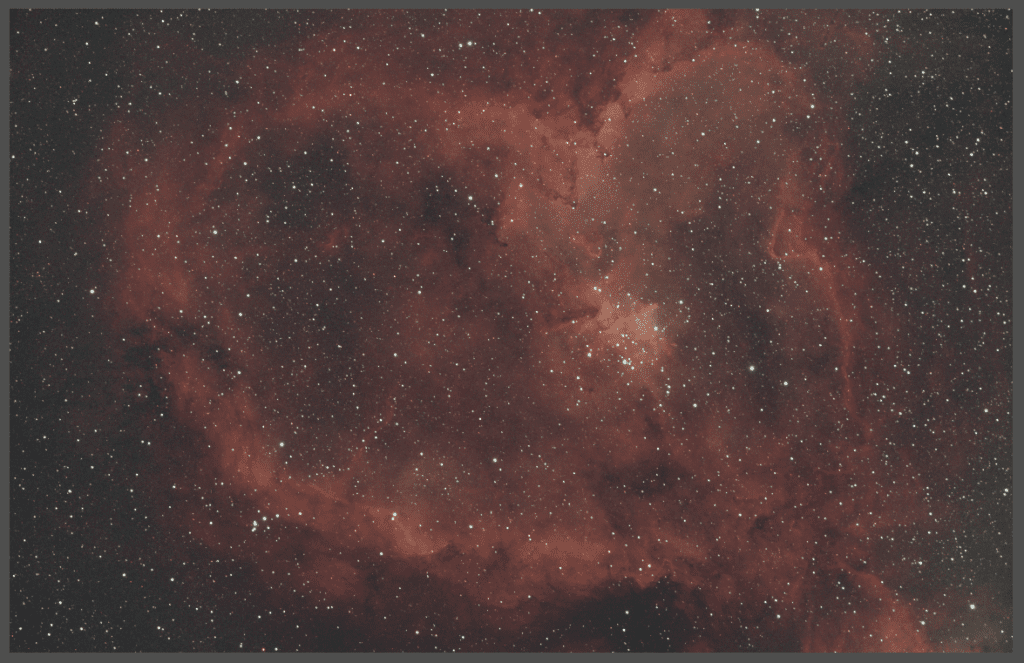
Step three – Background Neutralization
Background Neutralization helps is neutralize noise in the background and sets us up for a great image further in the processing. You need to select an area of the image of most neutral background and use this selection to run the task
What I do is find a dark spot without any background stars or nebulosity, zoom in and hit “Alt-N” to draw a box for preview. This preview will be used for neutralization and color calibration.
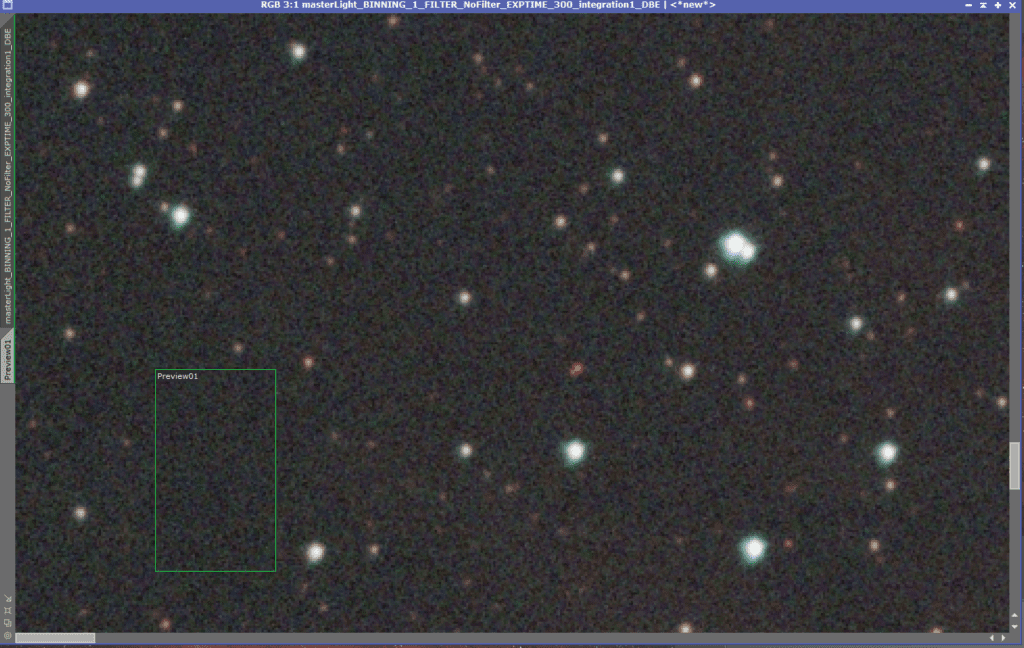
Be sure to hit a neutral part of the image and NOT accidentally neutralize dark nebula!
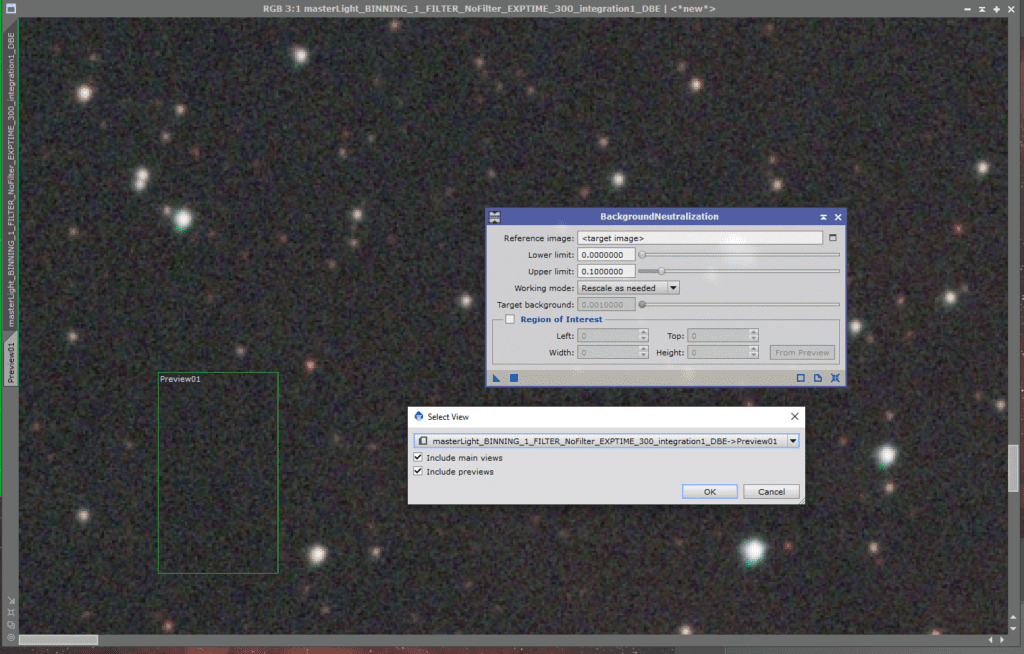
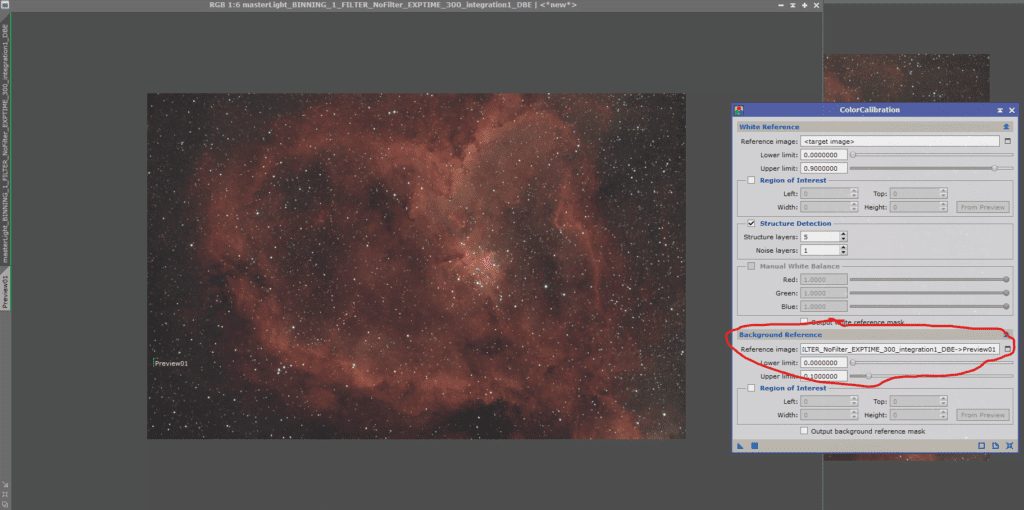
When we run background neutralization, we want to select the preview01 that we just made. Drag the triangle to the image to process the neutralization and you may need to un-stretch and re-stretch the window to see the new calibrated background.
Here you can see where my preview box was placed and the output of neutralization
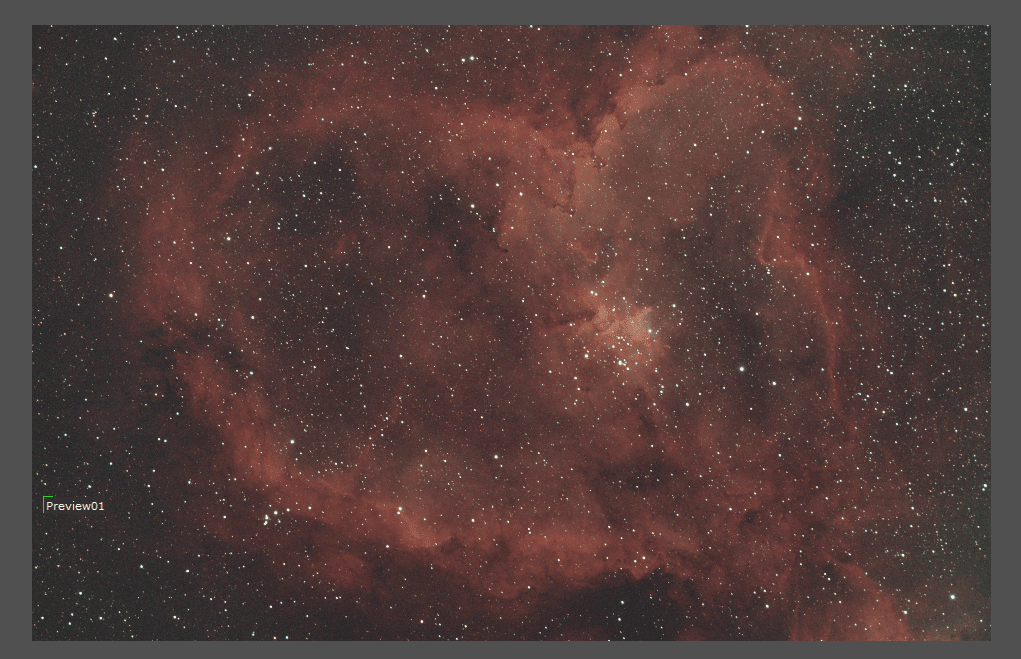
Step four – Color Calibration
This will help balance our histogram. You have several options here between Color Calibration, Photometric Color Calibration, and other utilities available. For this project, we’ll run the basic Color Calibration
Just like we did in background neutralization, we want to do the same here for color calibration.
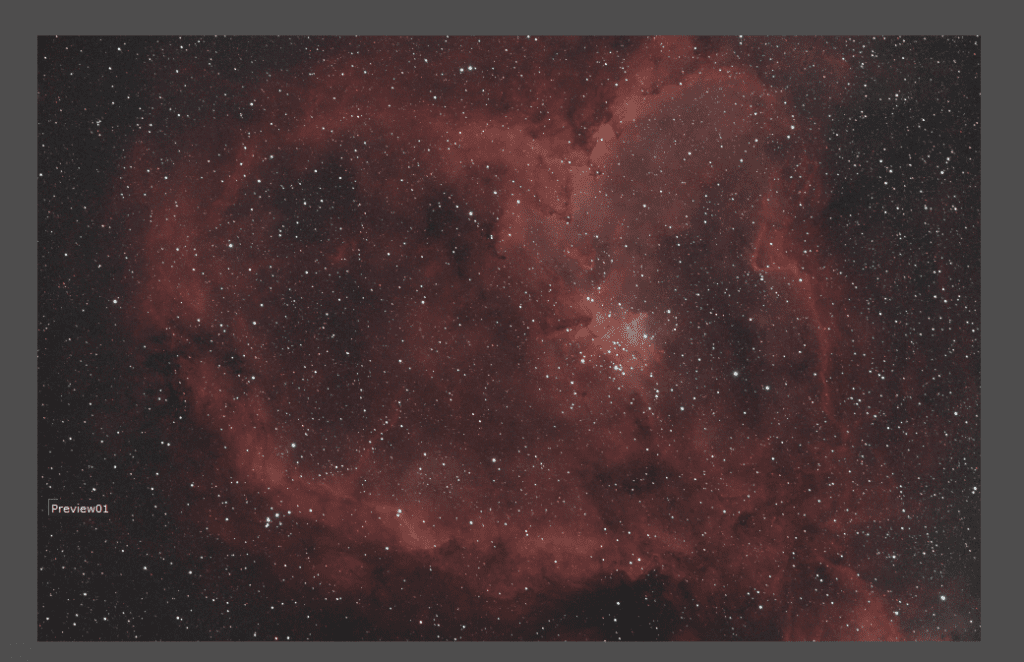
This is the output
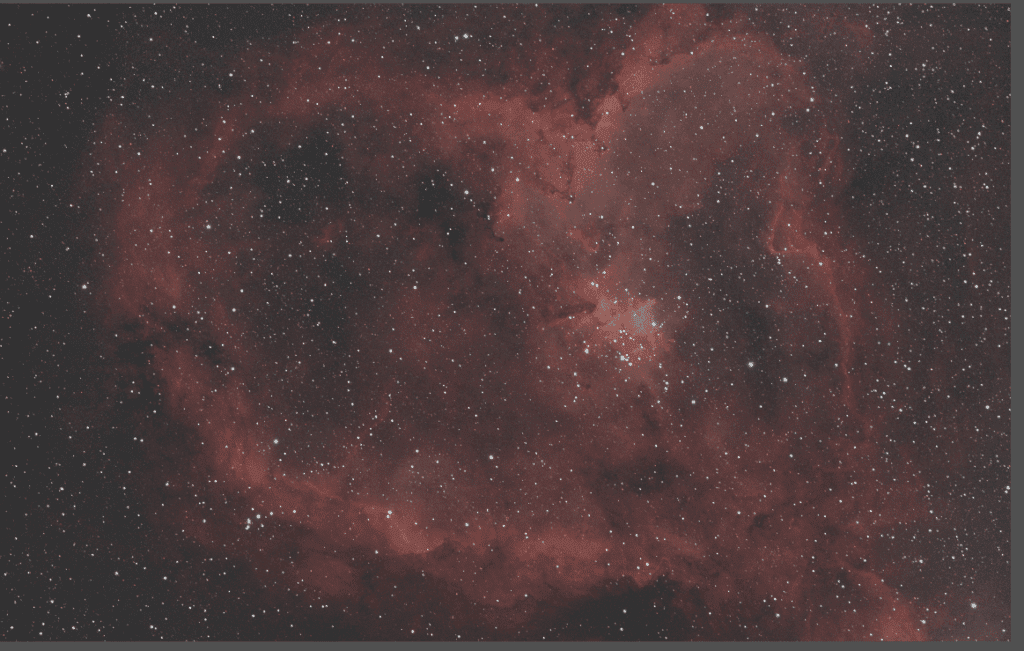
Step five – EZ deconvolute
Deconvolution is a nice tool that used to be lengthy and hard to re-produce. EZ Deconvolute simplifies this process so much that all it takes is the processing time instead of a ton of manual steps. Deconvolution is important since it looks at your data and stars and uses the point spread function (PSF) of the stars and how their shape is vs what they should be (round) to help correct and enhance detail and fine structure.
It can be hard to see the output here, but the process is something I typically do and the EZ Suite makes is super EASY, so I do it. Some things really shine with a deconvolution run while others take a lot of scrutiny. With careful masking and planning as this tool does, I always run this as it will never hurt to do so.
Launch EZ Deconvolution from Script -> EZ Processing Suite -> EZ Deconvolution
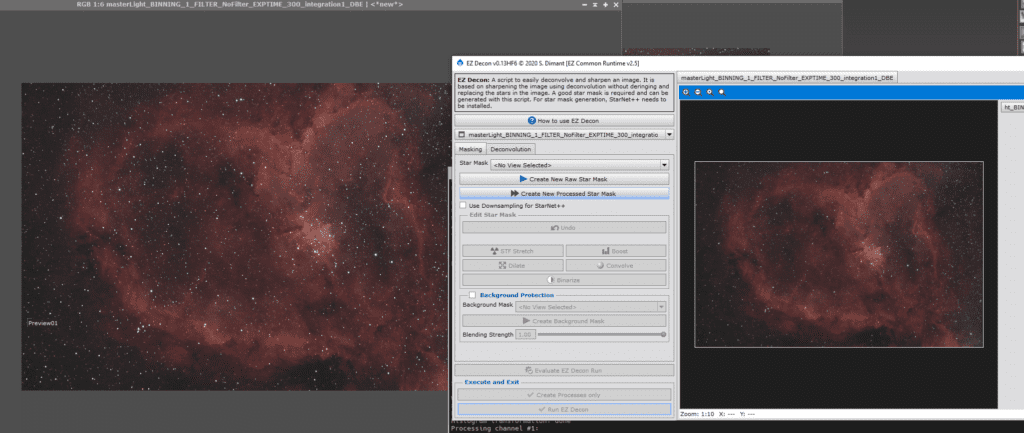
Select your image in the image dropdown (right under the how to use ez decon button),
- Click Create new star processed star mask (wait… or if you have NVIDIA GPU, search how to install GPU Starnet – more on this to come) (for brevity we go for everything automatic here)
- Click on Deconvolution Tab and click “Generate PSF”
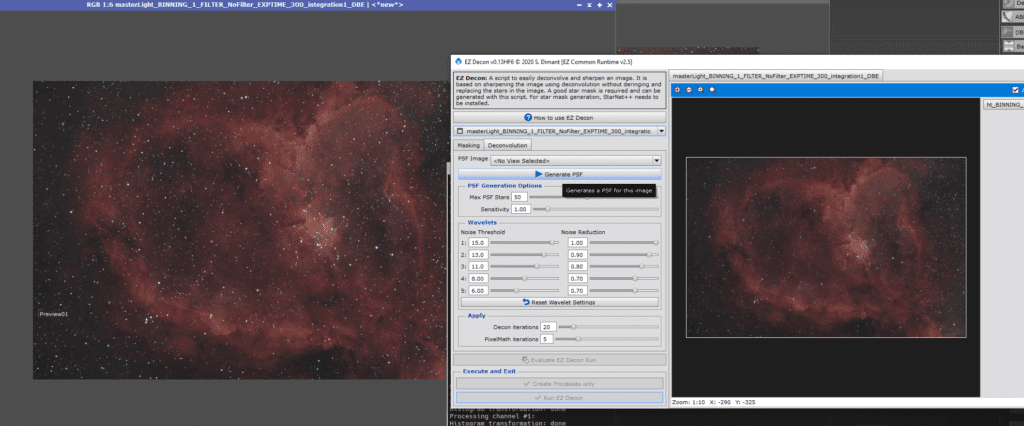
Once you have a star mask and PSF, Run EZ Decon button will turn to clickable (no longer be grayed out)
Click “Run EZ Decon” and it will go off and run. (It may take a while; it is CPU intensive)
Step Six – EZ Denoise
Short of collecting just a ton more data, we can run denoise algorithms to help clean things up. Getting to a dark sky will help us, taking longer exposures will help us, but denoise is a perfectly valid way to clean things up too
Launch EZ Denoise from Script -> EZ Processing Suite -> EZ Denoise
Select your image in the dropdown image selector and click “Run EZ Denoise” – Go grab a coffee and wait for it to be done.
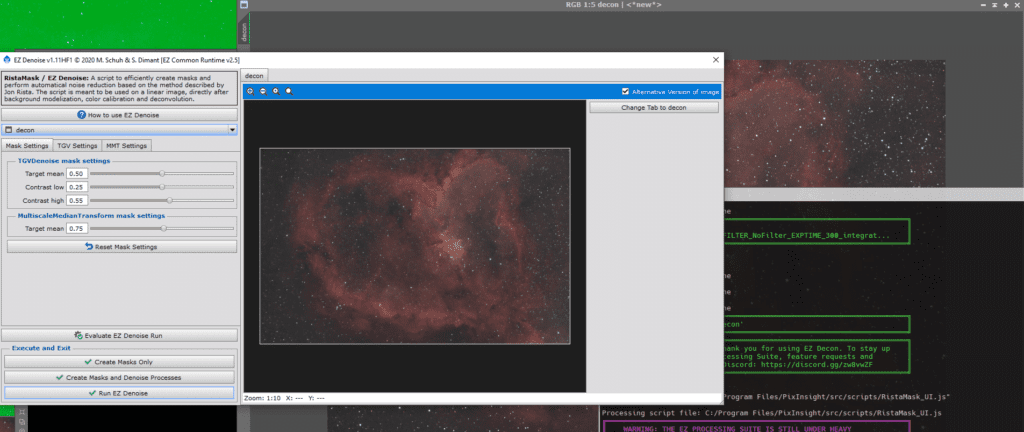
Denoise really cleans up the heart nebula and makes it a great target for limited integration times!
Step Seven – EZ Soft Stretch
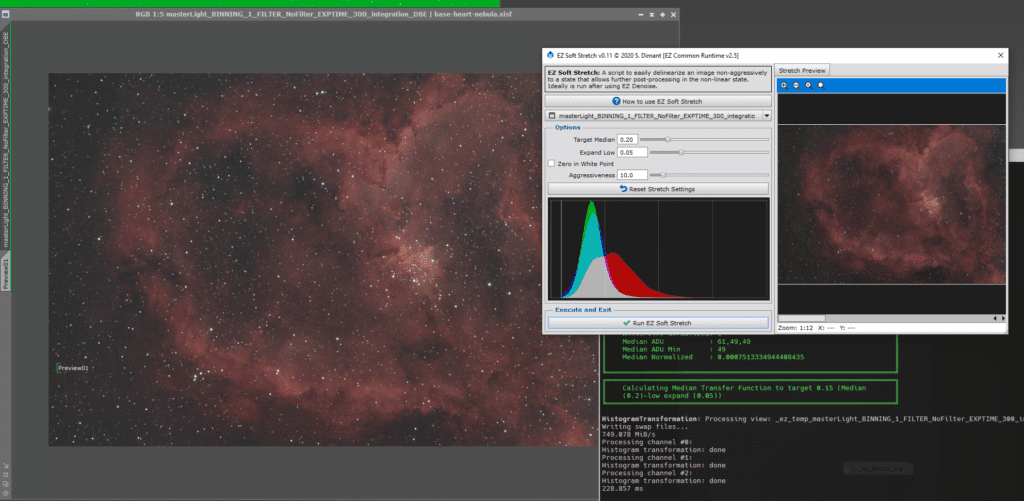
Time to end linear state and stretch the image! EZ Soft Stretch does a remarkable job here. Super easy too!
Launch EZ Soft Stretch from Script -> EZ Processing Suite -> EZ Soft Stretch
Select the image that you’re editing in the drop-box like the rest of the EZ tools and then click “EZ Soft Stretch” and away it goes!
Step eight – Curves
Process -> Curves
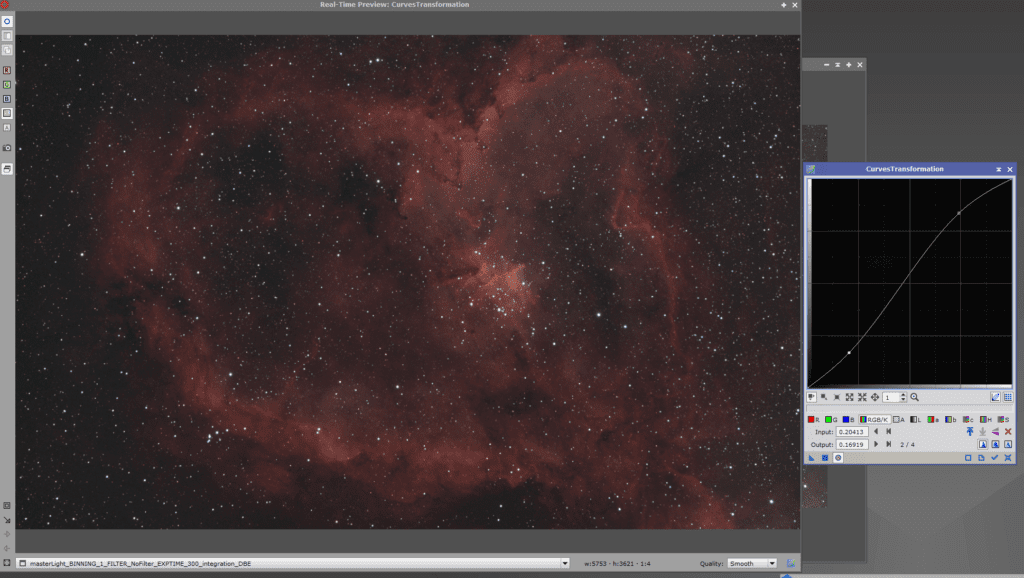
“Stretch to your creativity here” – Mess around with doing the “S” curve to tone down background light and pop out nebulosity. Experiment with colors, experiment with Hues. Make this image yours!
Step nine – Done
Like most artworks, nothing is truly “finished” – I suggest applying SCNR to eliminate any residual green tint, then use ACDNR to address any remaining noise. Don’t hesitate to experiment! Consider using the “Dark Structure Enhance” (a third-party plugin) and Exponential Transformation to add vibrancy. The Dark Structure Enhance can reveal some of the dark nebulae concealed within the Heart Nebula region, so enjoy exploring that feature! Additionally, you can employ PixelMath for HOO “Hubble Palette” color schemes to transition from the OSC Color to the Hubble color style. We’ll soon release guides and tips for our supporters on these techniques!
Heart Nebula – Collaborate with us!
Post and share – leave a comment with your rendition! We love seeing what our readers do with our data! This work is for you! We’d love to see what you do with it, how you use it and what type of creations you come up with whether using our raw data or mixing it with stuff you take! Please leave a comment below with a link to your astrobin, blog, Instagram or wherever you have published your derivative works and we’ll be sure to share them with our readers!
Make the heart nebula yours!
Pin It!
