
NINA 1.11 Sequence Builder walk-through
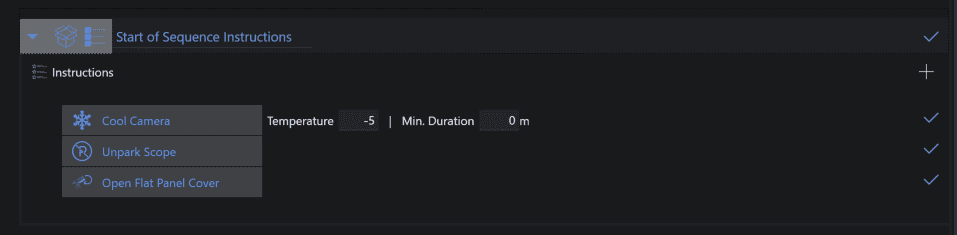
Start of Sequence
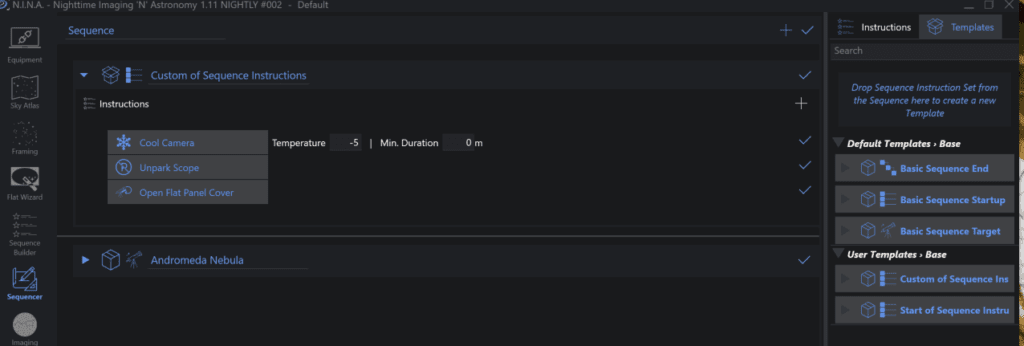
Here we can expand this box, set up our expected parameters, and sequence items we want. We’ll cool our camera to -5, unpark scope and open flat panel.
If you have a Dome Observatory automation tool running, you can drag over the Dome sequence item and add it to the start of sequence Instructions.
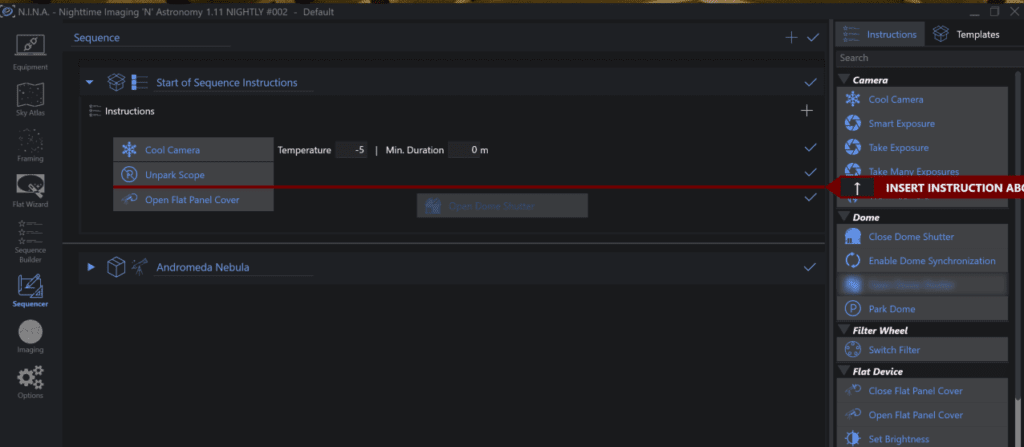
The drag-drop will show a red line where it will be inserted so you can change the order of events.
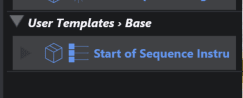
If you want something to always be set, you can save the sequence as a Template
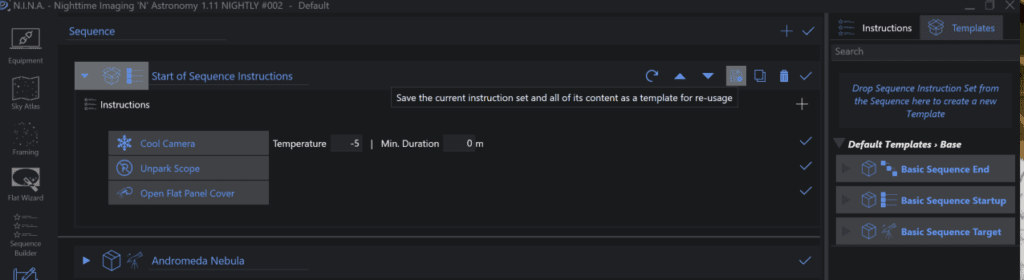
Click on the sequence, choose the save as template and click save.
You will now have a user template saved on right side bar
BTW, you can change the name of the sequence by clicking on it and saving it – this helps make sure you have something more descriptive if you wish.
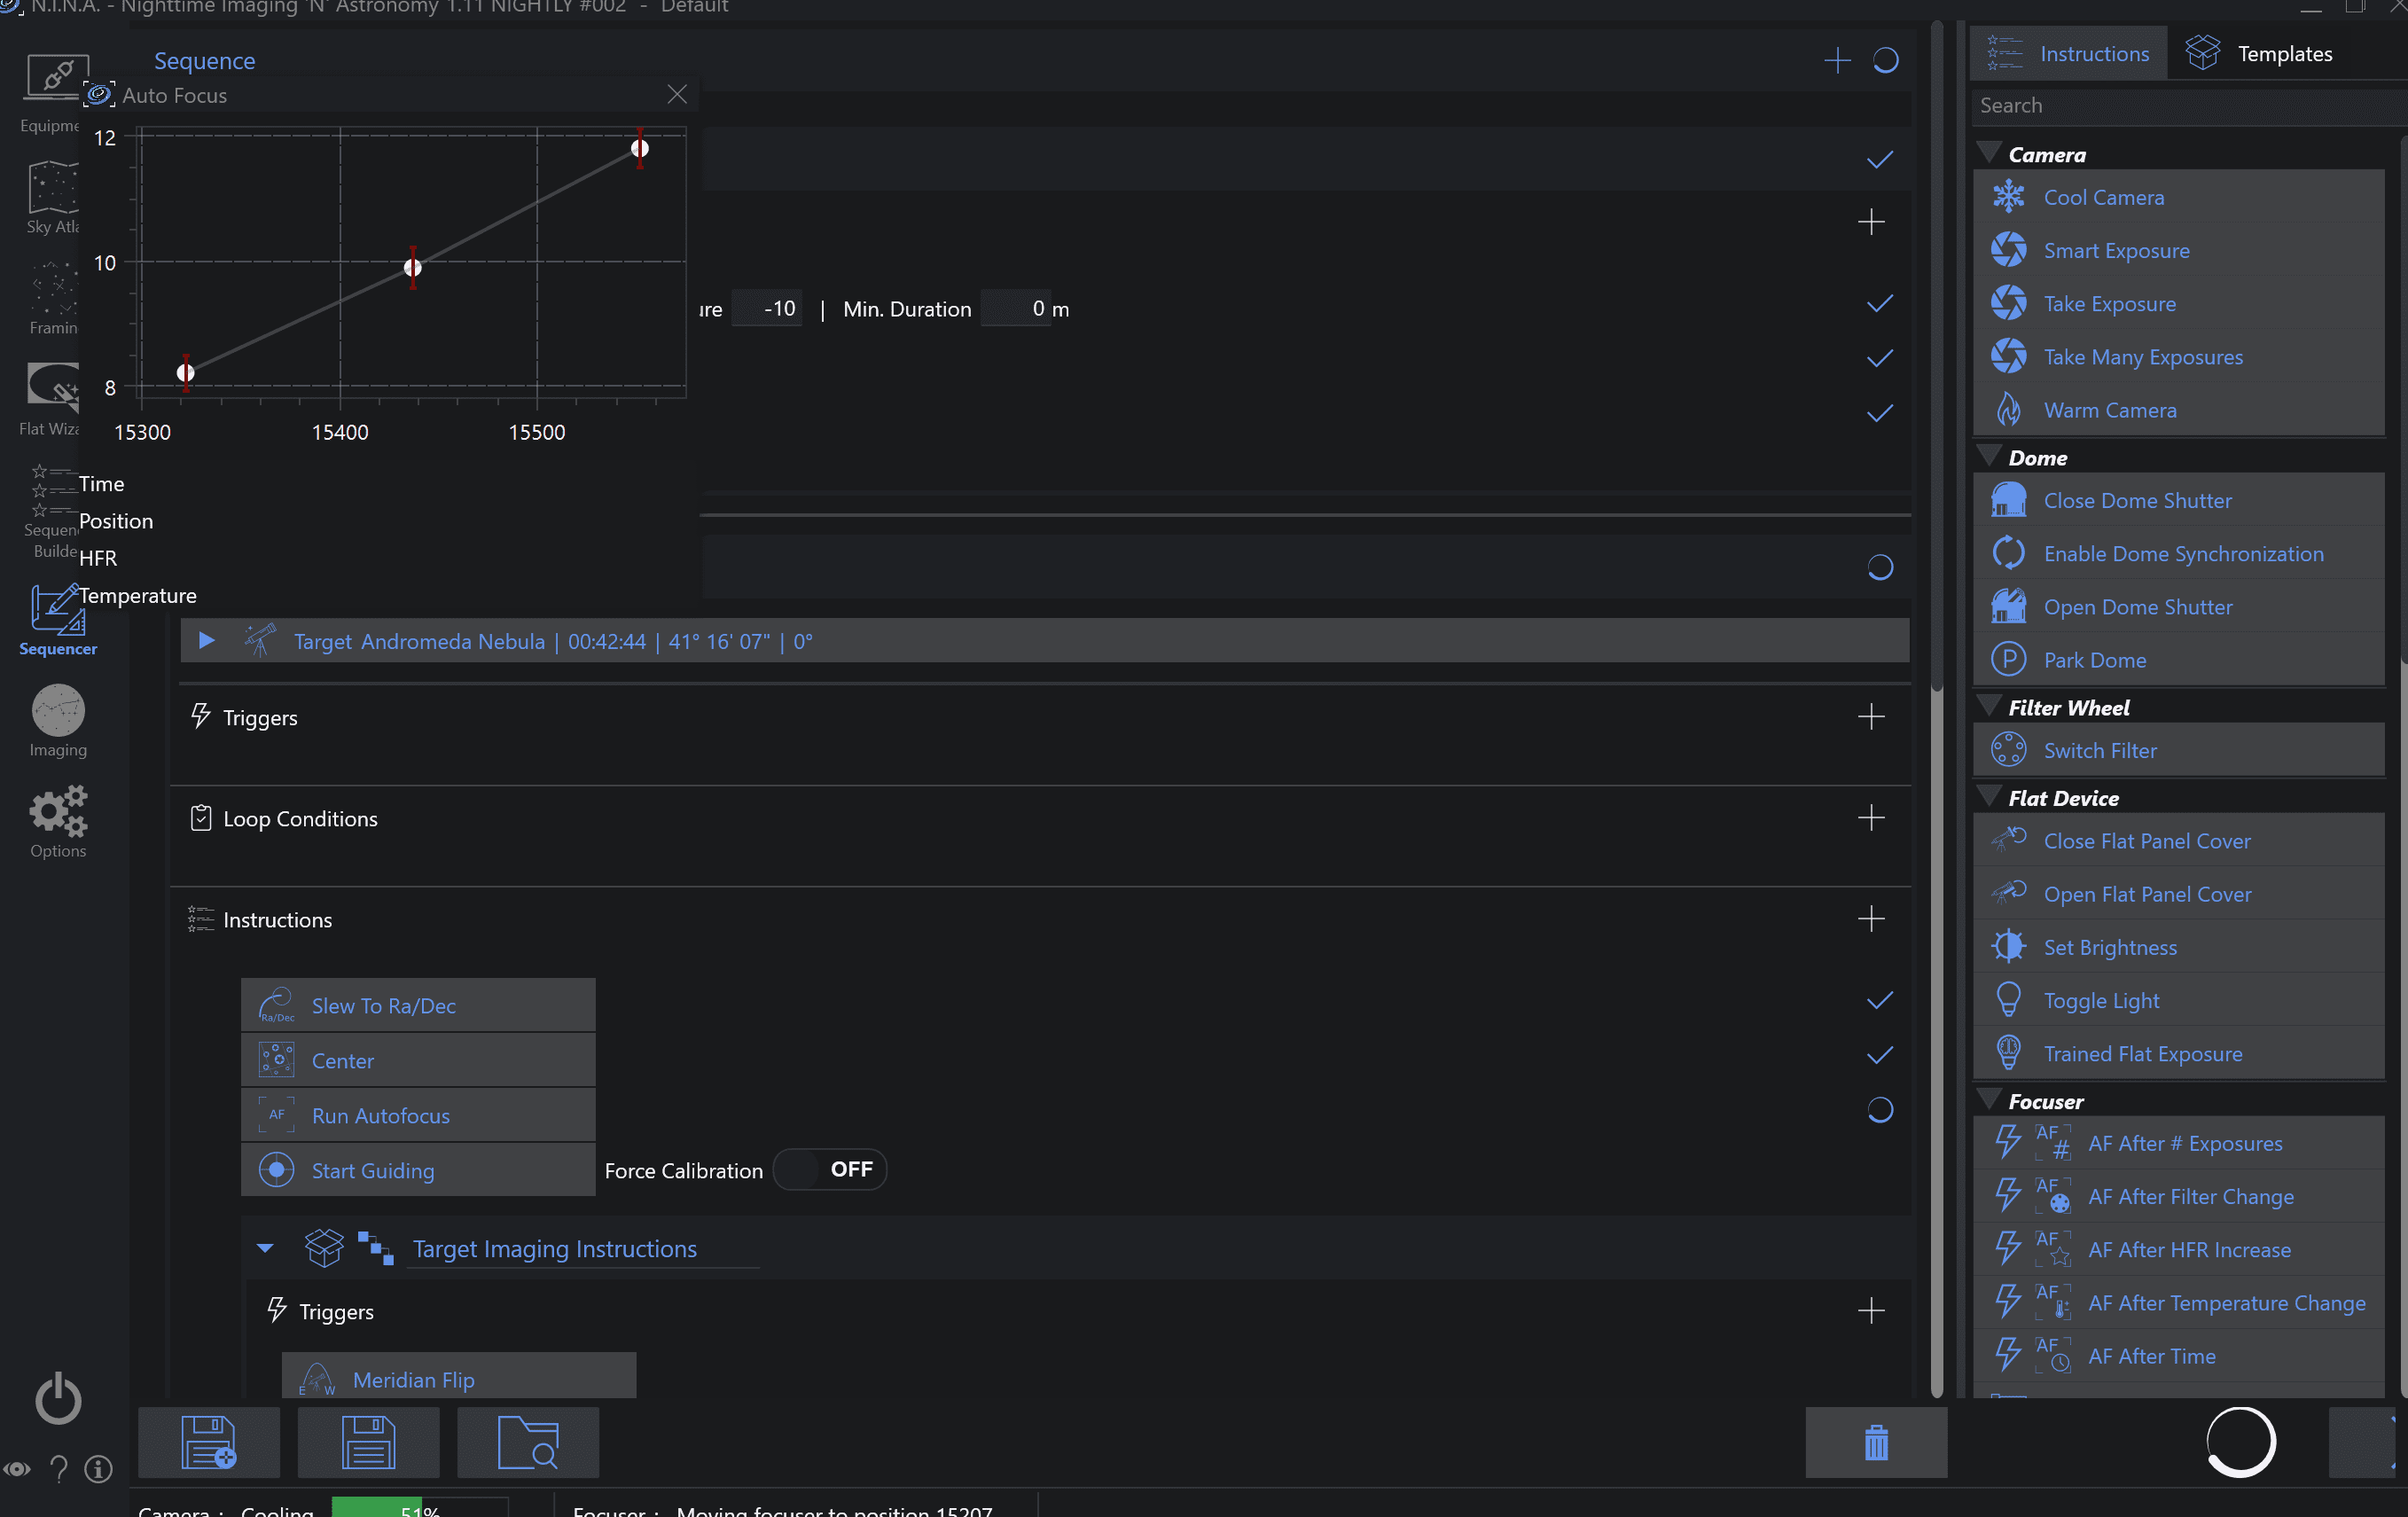
Imaging Sequence
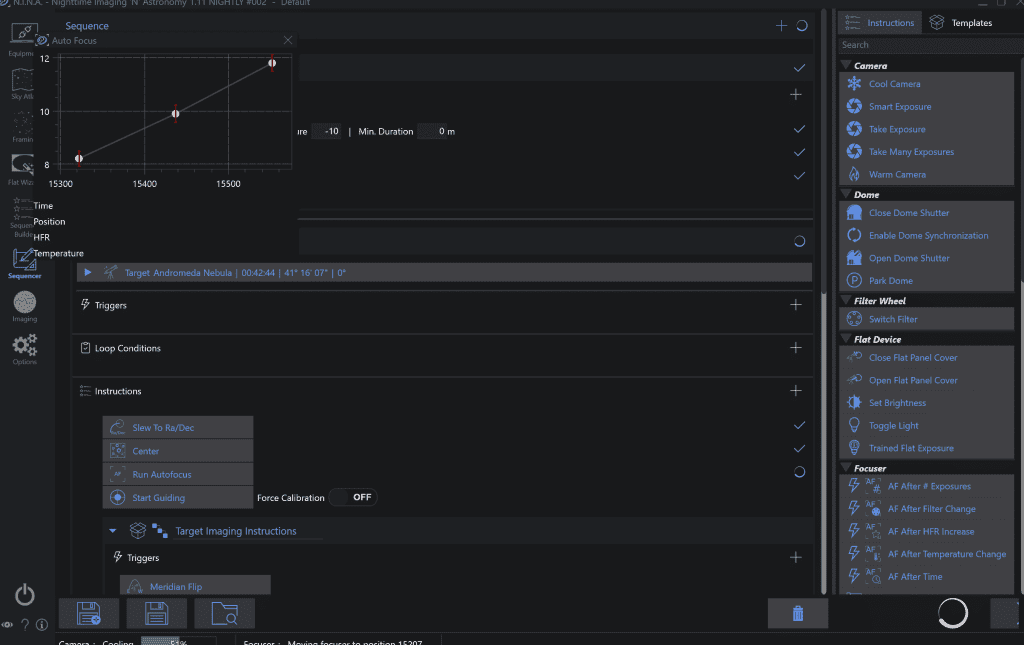
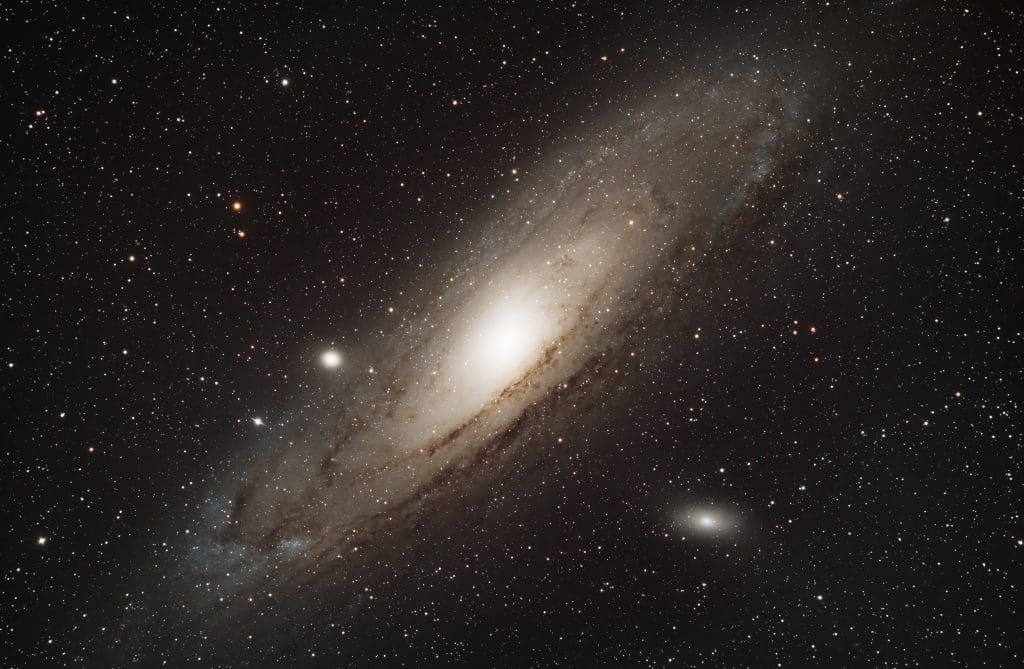
To keep things simple, we just start with the generated sequence. Our target is M31 – this was created through the Sky Atlas -> Framing Wizard -> Create sequence process. This creates a target with the correct position for us to image.
Since its a manual imaging run, there is no trigger up front. You can modify this to say “Wait for altitude” to have the sequence triggered when M31 is above the trees, but for now, I already know it’s up and available.
Our instructions are to slew to position, center the object, run autofocus and start guiding. If you select force calibration to ON, then PHD2 will re-calibrate its guiding -otherwise be sure to have PHD2 load its guiding automatically on startup. Check out our NINA & PHD2 Guide here for EQ6R users (helpful to any mount)
Triggers are actions that are triggered upon the condition while the target is being imaged. We’ll want to meridian flip, after 25 exposures we’ll re-focus and we’ll re-focus after Filter change. You can drag in to refocus at HFR change or any trigger you want. NINA supports custom triggers so you can build your own as well.
The Instructions or Loop condition can go hand in hand. Since I specified a total sub count knowing how long it would take, I just said 160×90 second subs. You can change the loop condition to be “Loop until iteration” or “Loop until time” to loop until you have 160 (or whatever number you want) or loop until time and you will just collect data until time.
With these basic triggers and instructions, you can now create super simple but re-usable building blocks for sequences that afford you great control – from running a mosaic over multiple nights to imaging multiple targets at their prime imaging area based on altitude.
This guide is just the beginning, experiment around but use this process to start out building something that works well.
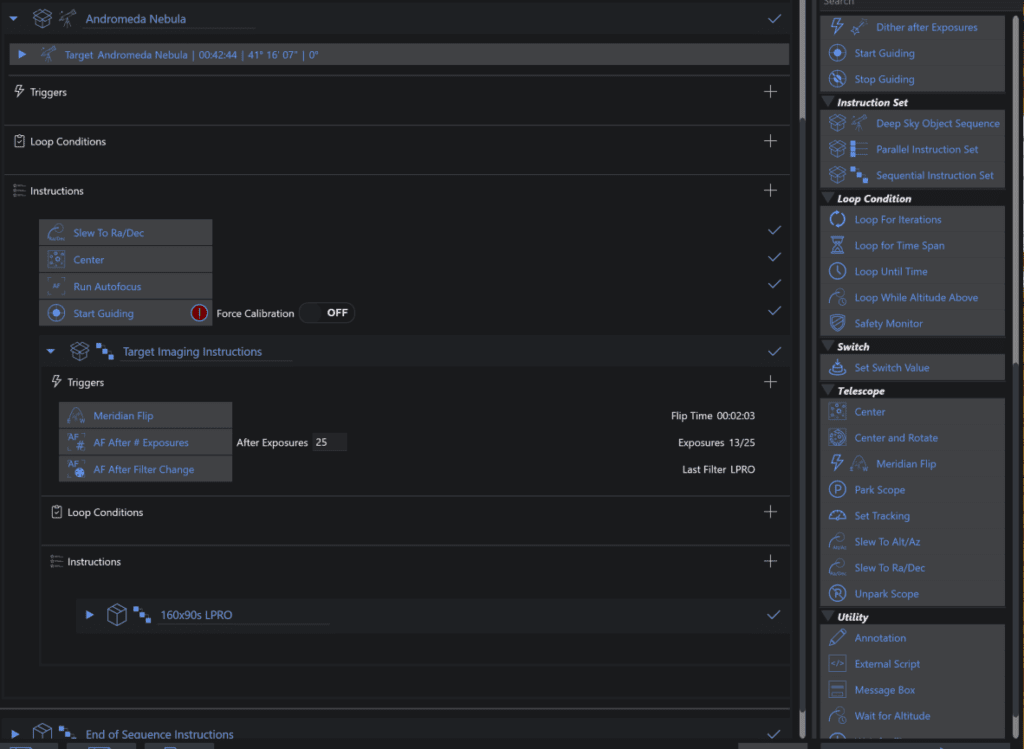
End of Sequence
Just like the other sequence “stanzas” the end of sequence just shows what will run when the main sequence is complete. I run the typical ones of parking my scope, closing the flip flat and warming the camera back up. You can use your own custom scripts here to send a text, email, SMS or whatever you want to notify you that the sequence is complete.
Sequence Running
Here we can see what it looks like when NINA steps through the sequence. Focus is currently running, and you can see the steps that have completed prior and the ones coming up.
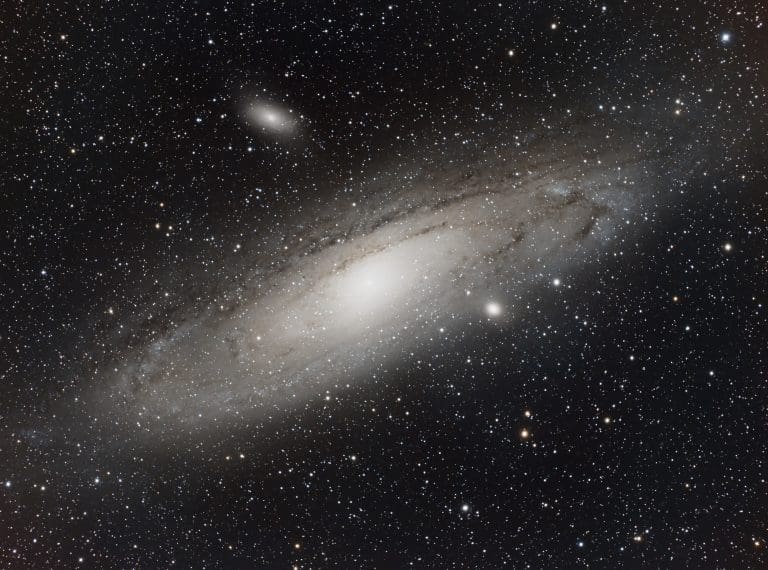
First light with 1.11
Spent the night imaging between the clouds shooting M31 – Everything worked out pretty well!
How to get Help
Happy to answer questions here, but otherwise the best place to get support is the amazing Discord Server where there is a great community to help answer questions and point you to the right direction.
You can also read the documentation here:
https://nighttime-imaging.eu/docs/develop/site/


Hi Byron,
Great blog and fabulous result. I was browsing using NINA as the search term as looking for a possible replacement for Cartes du Ciel for my remote observatory. Had also considered Prism but I am wanting a planetarium based solution. Stellarium uses too much resources on my remote pc and I am wondering if Sky Chart will offer me more objects than Cartes du Ciel … eg comets and possibly even the ISS.
Really appreciate your easy to follow guide and thank you for your time 🙂
Steve
It’s going to be finish of mine day, but before finish I am reading this impressive paragraph to
improve my know-how.